Mezcalita de Citrico

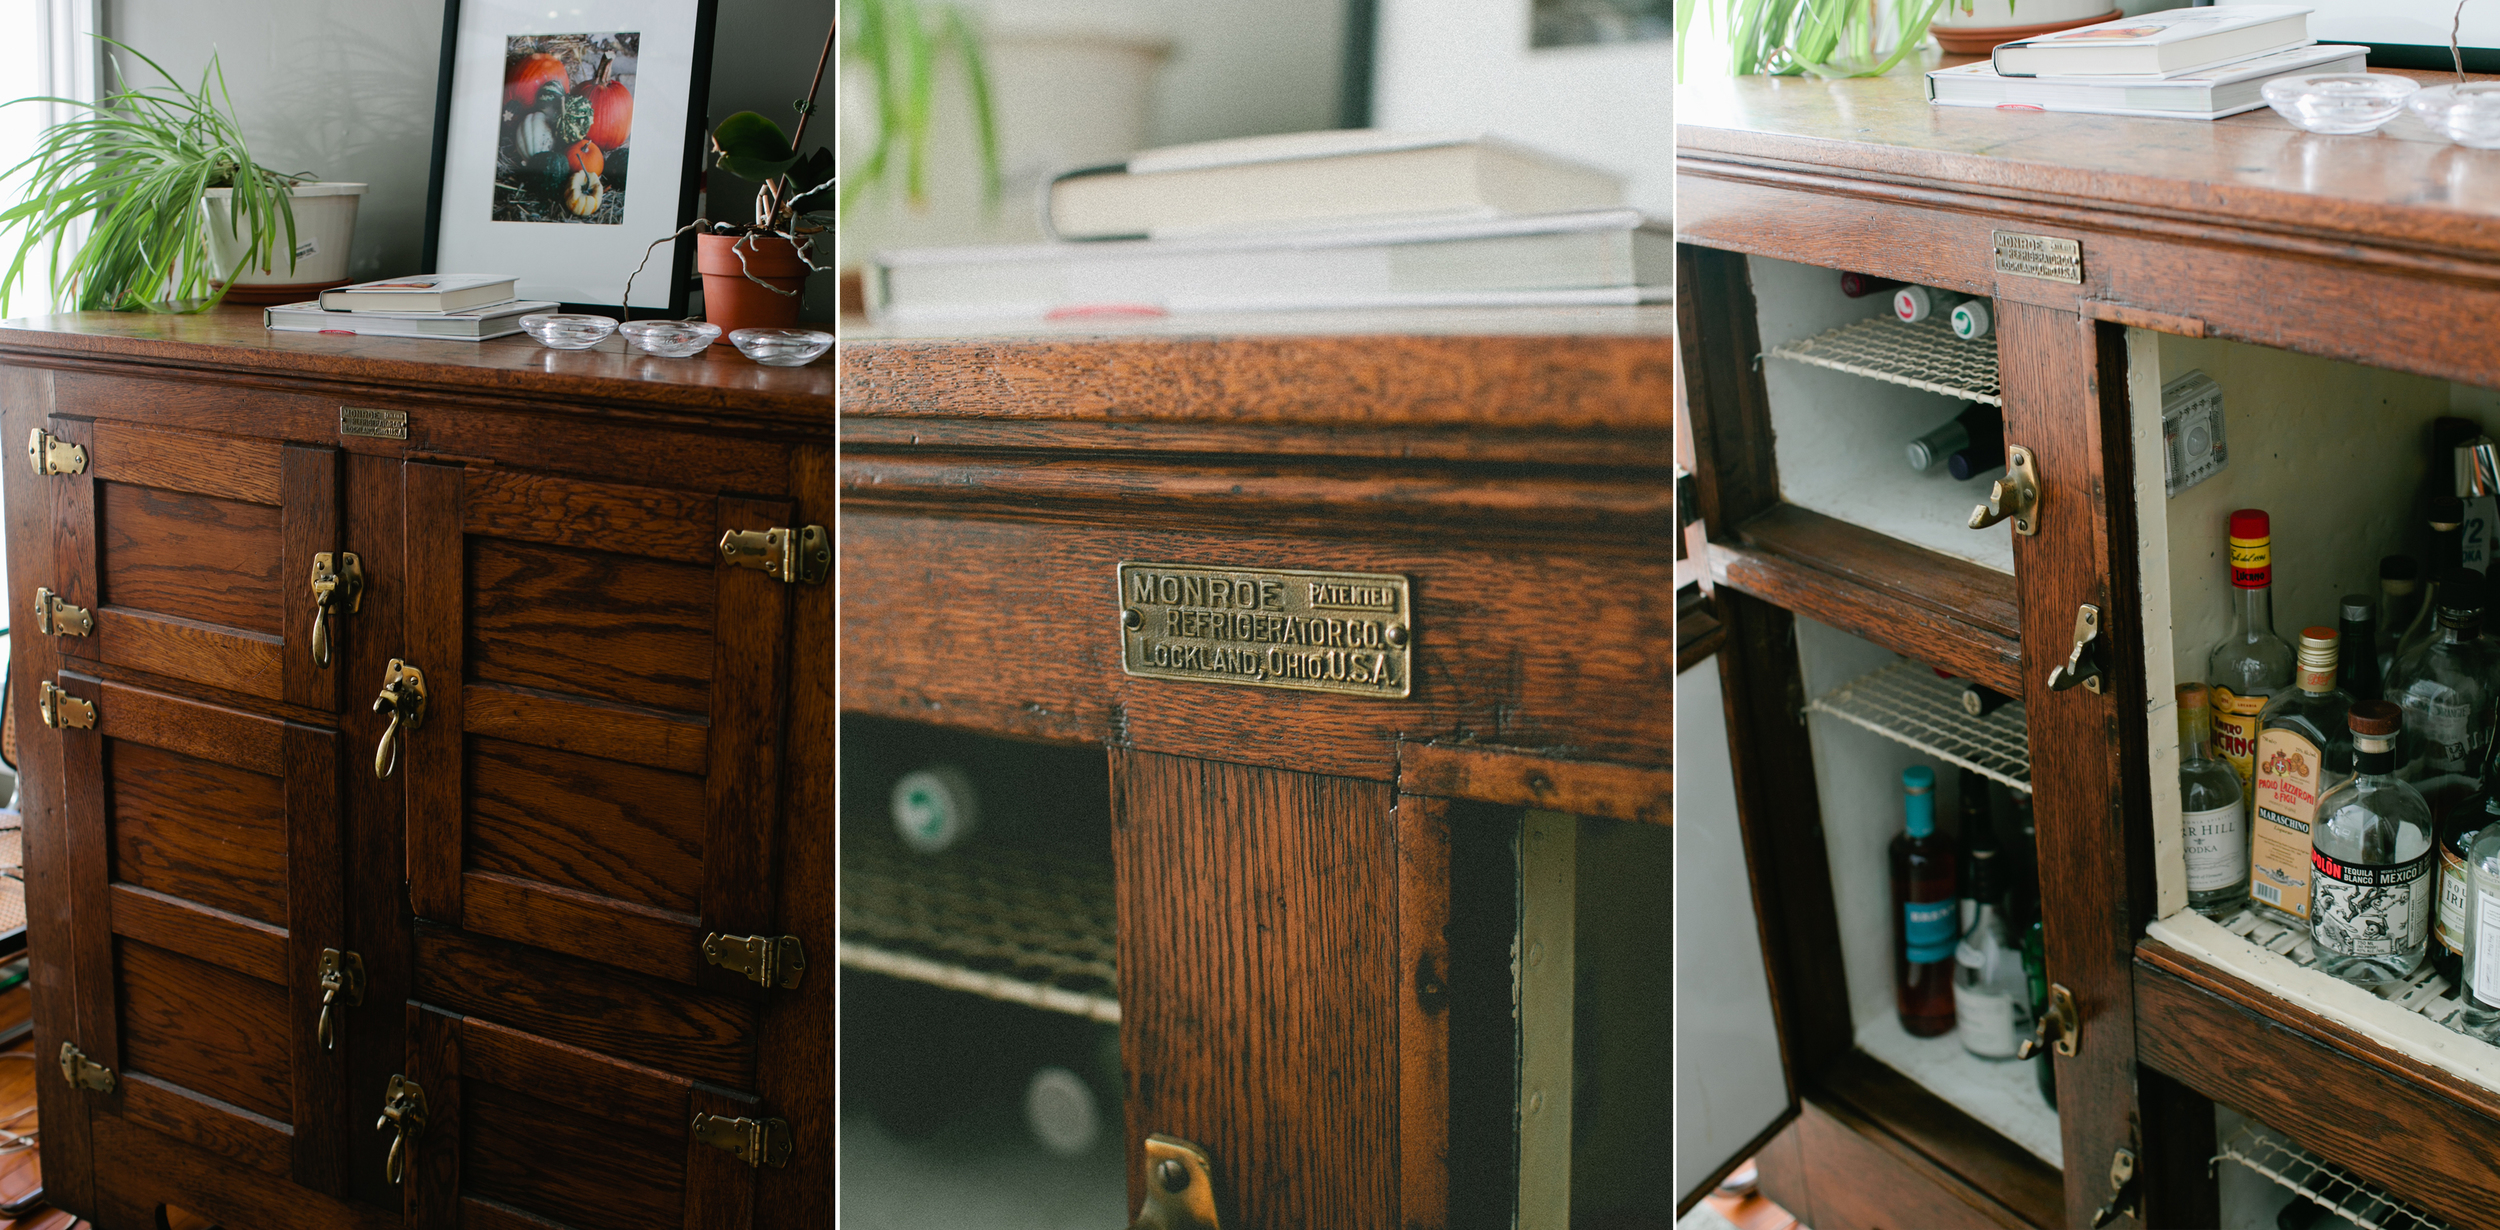
One of our favorite pieces of furniture is an antique ice box Eric's mom gave to us as a "house cooling present." Weighing close to 500 pounds, it took four large men, and some guidance from Eric, to move it in.  It will remain exactly where it stands for as long as we're here. The thing is a beast. But it's a beautiful beast and we have a very special use for it: it's where we store all our liquor. Well, most of our liquor. Beer and wine is stored downstairs. The ice box has everything else. Want bourbon? We have at least four kinds. Gin? Oh, we have plenty of that. Scotch, rum, tequila, vodka? Got it.

Recently, I've been playing around a bit more with tequila and mezcal.  I've always been a fan of agave-based spirits. Its vegetal flavor (mainly, notes of green pepper) is unlike anything I've experienced in other liquor.  I know not everyone enjoys them as much as I do. I have to wonder, though, if maybe the negative association comes from a bad experience with it in college many years ago and now they've sworn it off. It might be time to give them another try.

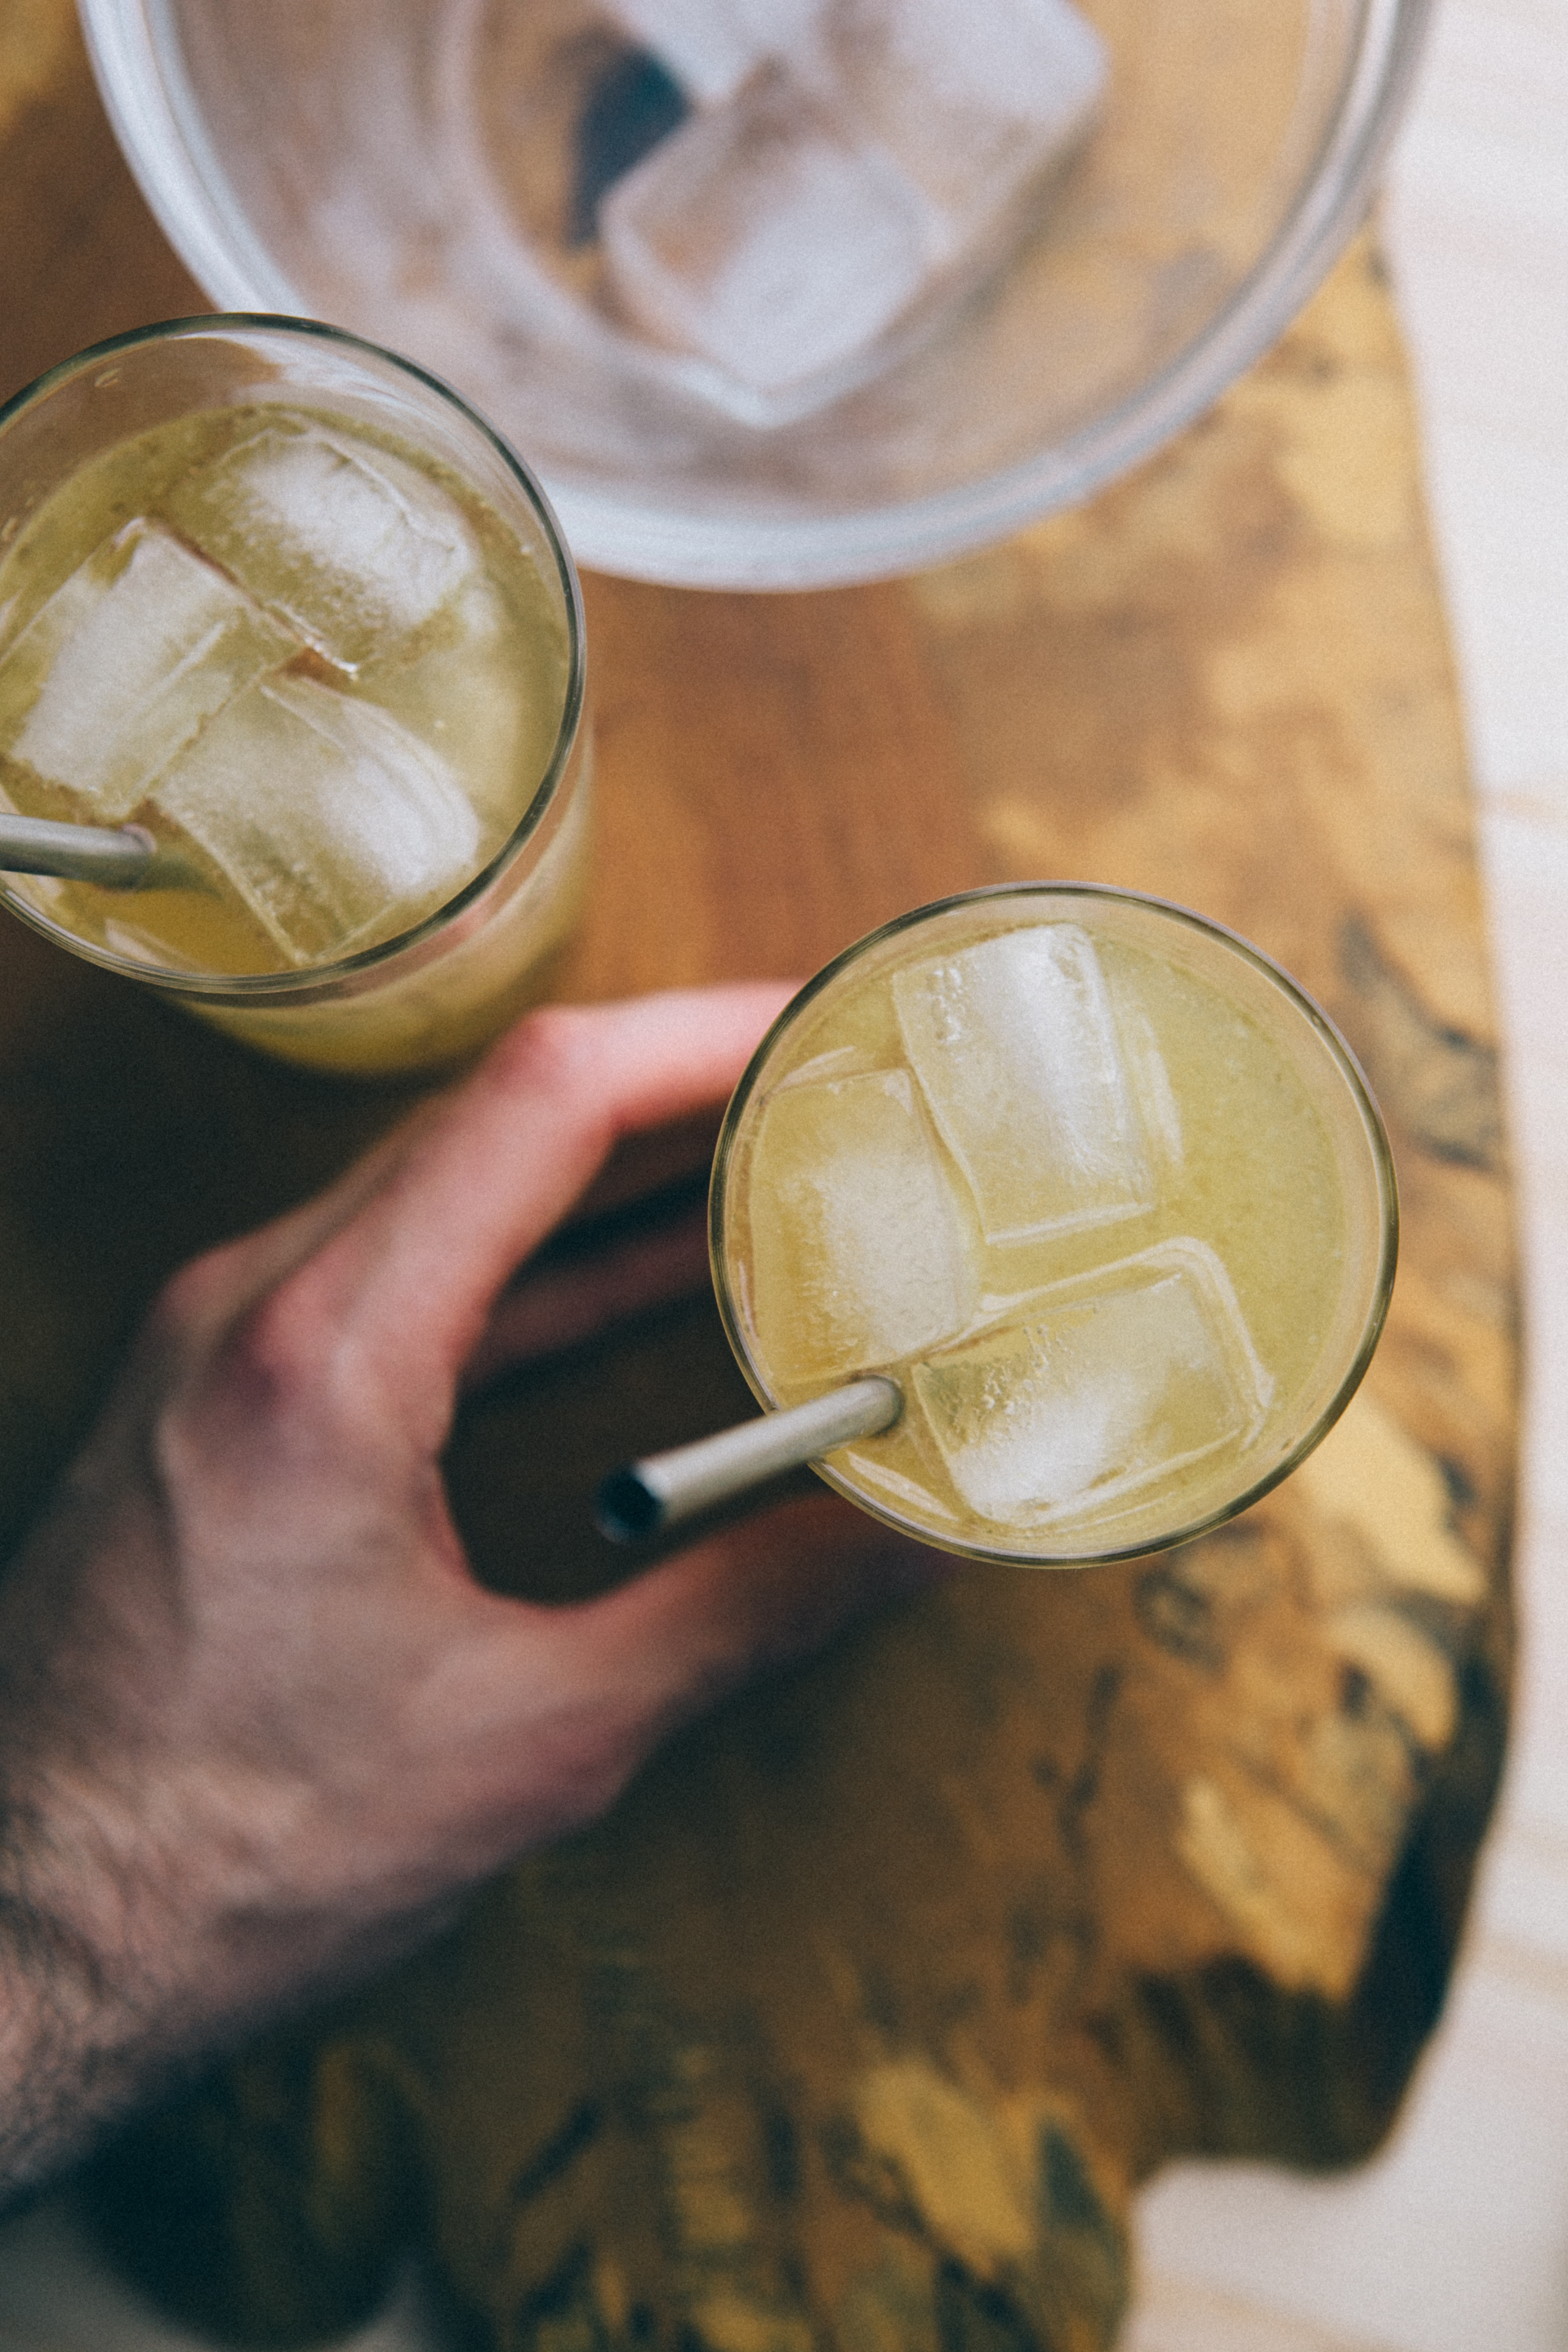
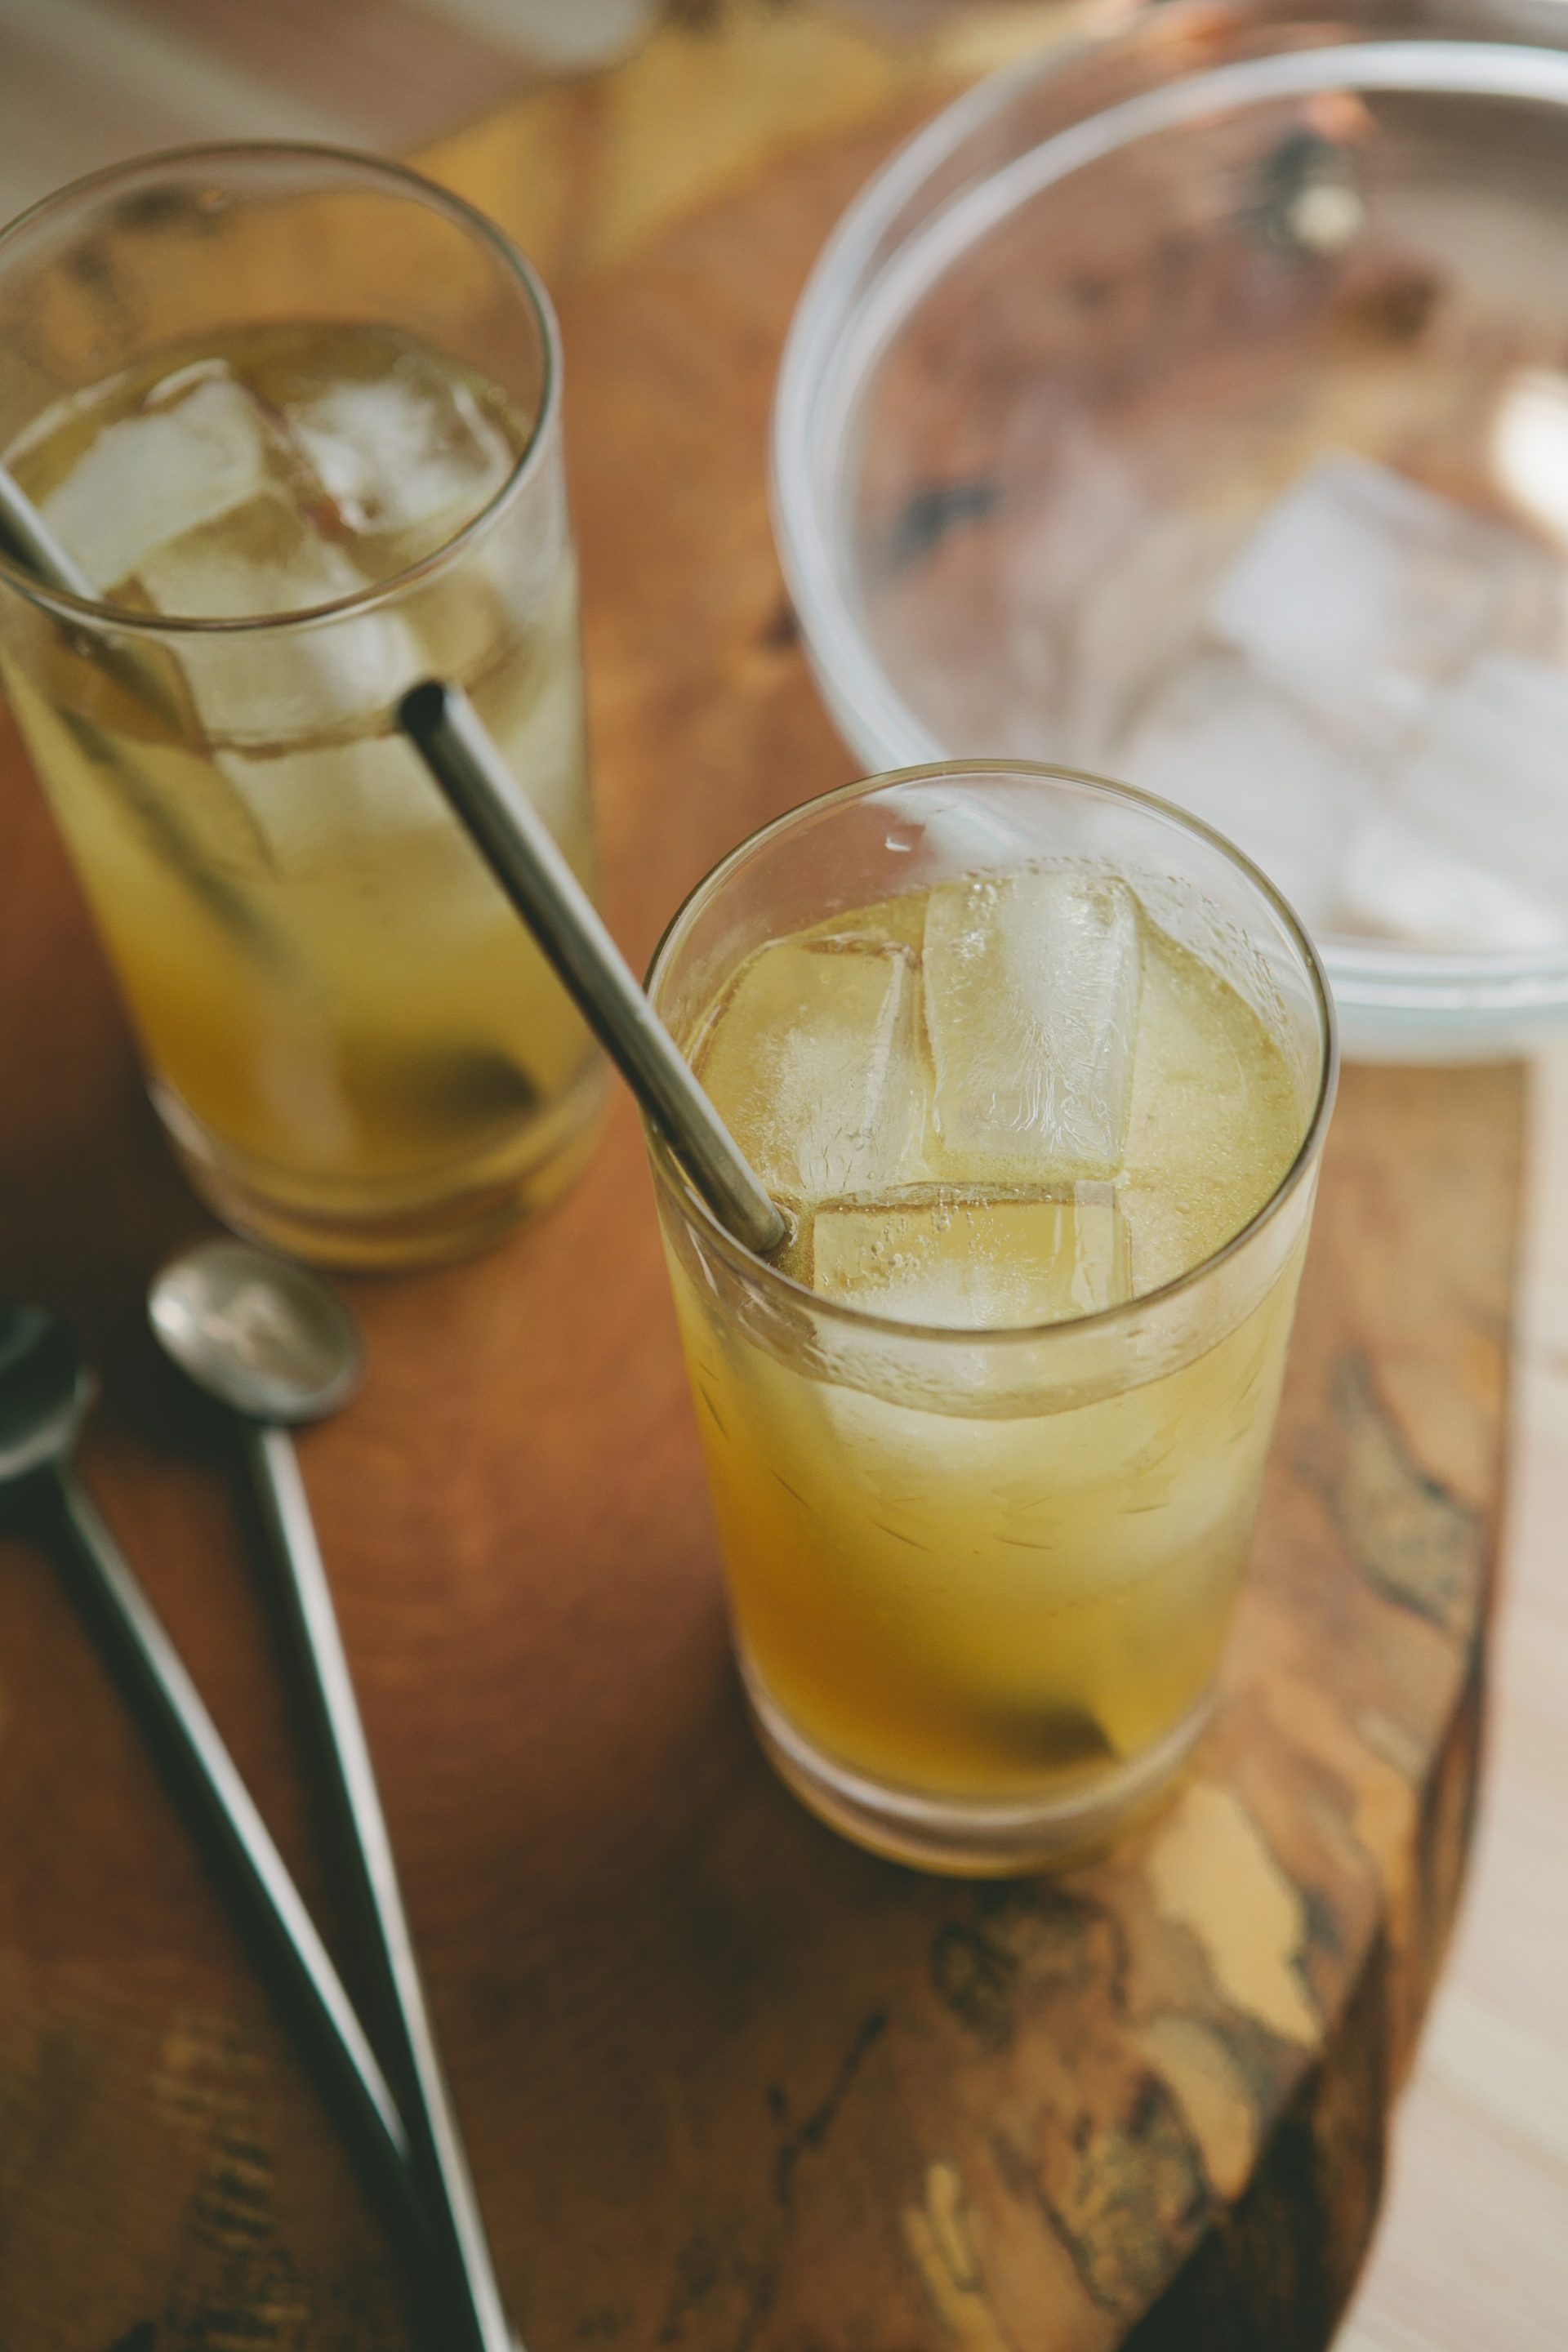
When I'm out at a bar, I'll often request a combination of mezcal and citrus. I know I'll get a balanced cocktail with those two ingredients. One evening at The Baldwin Bar, a gem of an establishment that is located north of Boston, I asked Ran Duan, the bar manager, to make me such a drink. A few minutes later, he presented a highball glass with a metal straw sticking out. The first sip took me aback. What is that? It's good. I know that flavor. I like it. Is that... sesame oil? It may not have been the first time someone's made a drink with oil in it, but for this guy here, it was life-altering. And that's where the inspiration for this mezcalita came from.

You know who else would enjoy one of these drinks? Jessica of How Sweet It Is. Though, there's a slight problem. Well, maybe we shouldn't call it a problem... but it's something that's getting in the way of her consuming one (or a pitcher) of these: she's having a baby. A bunch of us bloggers have banded together to throw a virtual baby shower for Jessica. Knowing her, I think she's going to love every one of these recipes (the epic list can be found below). The idea was to do "trashed up" versions of different food and beverages. When it comes to drinks, though, it's just all about the booze. And creating a drink that you want to have multiple rounds of. Pretty sure I got those things covered with this mezcalita.

So, I'm raising my glass to you, Jessica! I have no doubt that you'll be a wonderful mother: caring, thoughtful, and a lot of fun. Just a few more months and you'll be able to sip on one of these! I'm sure you can't wait.

Other blogs who created recipes for Jessica's baby shower:

trashed up salads

Gimme Some Oven | Asian Broccoli Salad with Peanut Sauce The Lemon Bowl | Brussels Slaw with Tahini Dressing and Za'atar Crostini With Style & Grace | Kale Salad with Apple, Hazelnuts & Bacon

trashed up cocktails

Dine & Dish | Hot Buttered Rum Cocktail Food For My Family | Cranberry Orange Dark and Stormy Cocktail Minimalist Baker | Bourbon Pumpkin Milkshakes Stylish, Stealthy & (sometimes) Healthy | Apple Cider Shandy A Spicy Perspective | Preggy Punch Mocktail Girl vs. Dough | Boozy Maple Peanut Butter Cup Milkshake Honestly Yum | Maple Bacon Pisco Sour Cookin Canuck | Pink Grapefruit Margaritas A Thought For Food | Mezcal de Citrico A House in the Hills | Pomegranate Rosemary Spritzer The Novice Chef | Ginger Bourbon Apple Cider Bran Appetit | Citrus Cider Punch Floats

trashed up burgers

Edible Perspective | Meatloaf Veggie Burgers with Mashed Potatoes + Gravy The Little Kitchen | Salmon BLT Sliders with an Avocado Aioli & Brie Daisy At Home | Balsamic Beef Burger with Mac and Cheese Cookies & Cups | Candied Bacon Maple Cheddar Burger Climbing Grier Mountain | Trashed-Up Steak Burger with Chicken Fried Bacon & Dijon Gravy Dessert For Two | Bleu Cheese Burgers + Sweet Potato Fries Country Clever | Fig Rosemary Roast Chicken Brie Brussels Sprout Panini Foodie Crush - The Best Cheeseburger Soup Lady and Pups | Spicy Sambal Chicken Meatball Sub with Eggs Two Peas & Their Pod | Sweet Potato and Kale Grilled Cheese Bake Your Day | Ultimate Breakfast Sandwich

trashed up tacos

Spoon Fork Bacon | Crunchy Ground Beef and Cheesy Tacos The Fauxmartha | Boozy Beef and Butternut Tacos With Food + Love | Harvest Hash Breakfast Tacos Mountain Mama Cooks | Crispy Kale and Brussels Sprout Tacos with Bacon Heather Christo | Bahn Mi Tacos with Spicy Sriracha Honey Sauce A Couple Cooks | Loaded Huevos Rancheros Tacos Fitnessista | San Diego Lobster Street Tacos

trashed up desserts

Table for Two | Salted Caramel, Dark Chocolate, and Brown Butter Shortbread Bars with Sprinkles My Name is Yeh | Mini Vanilla Loaf Cakes, All Trashed Up Picky Palate | Pumpkin Spice Butterscotch Sprinkle Cupcakes Sprinkle Bakes | Cake Batter Confetti Cupcakes Averie Cooks | Easy Homemade Funfetti Cake with Vanilla Buttercream Sweet Phi | Trashed Up Shortbread Cookie Bars Love & Olive Oil | Loaded Junk Food Brownies Lauren’s Latest | Bakery Sugar Cookies Cookie + Kate | Peanut Butter, Banana, Honey and Oat Chocolate Chip Cookies Flourishing Foodie | Triple Layer Chocolate Cake with Salted Caramel Buttercream Frosting The Sugar Hit | Salted Caramel Popcorn Ice Cream Cake Hummingbird High | Breakfast Cereal Cake Donuts Top With Cinnamon | Triple Chocolate Vanilla Swirl Crumb Cake Bake at 350 | Chocolate Chip Cookie Ice Cream Sundaes Simple Bites | Lemon Layer Cake Bakerella | Baby Block Cake Pops She Wears Many Hats |  Chocolate Covered Grapefruit

trashed up pizza

Bev Cooks | Beer Battered Fried Calamari Pizza Rachel Cooks | Apple and Chicken Sausage Pizza with Macaroni and Cheese Stuffed Crust Foodie With Family | Trashed Up Barbecue Turkey Pizza Shutterbean | Pesto Potato Bacon Pizza i am a food blog | Grilled Cheese Pizza My Life as a Mrs | Chili Cheese Dog Pizza Simply Scratch | Steak + Blue Cheese Pizza with Crispy Fried Shallots and Honey Balsamic Drizzle The Beeroness | Beer Cheese Tater Tot Pizza Yes I Want Cake | Roasted Pumpkin Pizza Two Red Bowls | Bacon Mashed Potato Pizza Dula Notes | Pork Bahn Mi Pizza Weelicious | Trashed Up Mexican Pizza Pockets Take a Megabite | Roasted Beet Pizza Hungry Girl Por Vida | Hard Cider Braised Pork with Sour Cherries and Cheesy Polenta Bakers Royale | Trash’d Street Tacos


Mezcalita de Citrico

Yield 1 cocktail, but can easily be multiplied

Glassware Highball glass

Ingredients

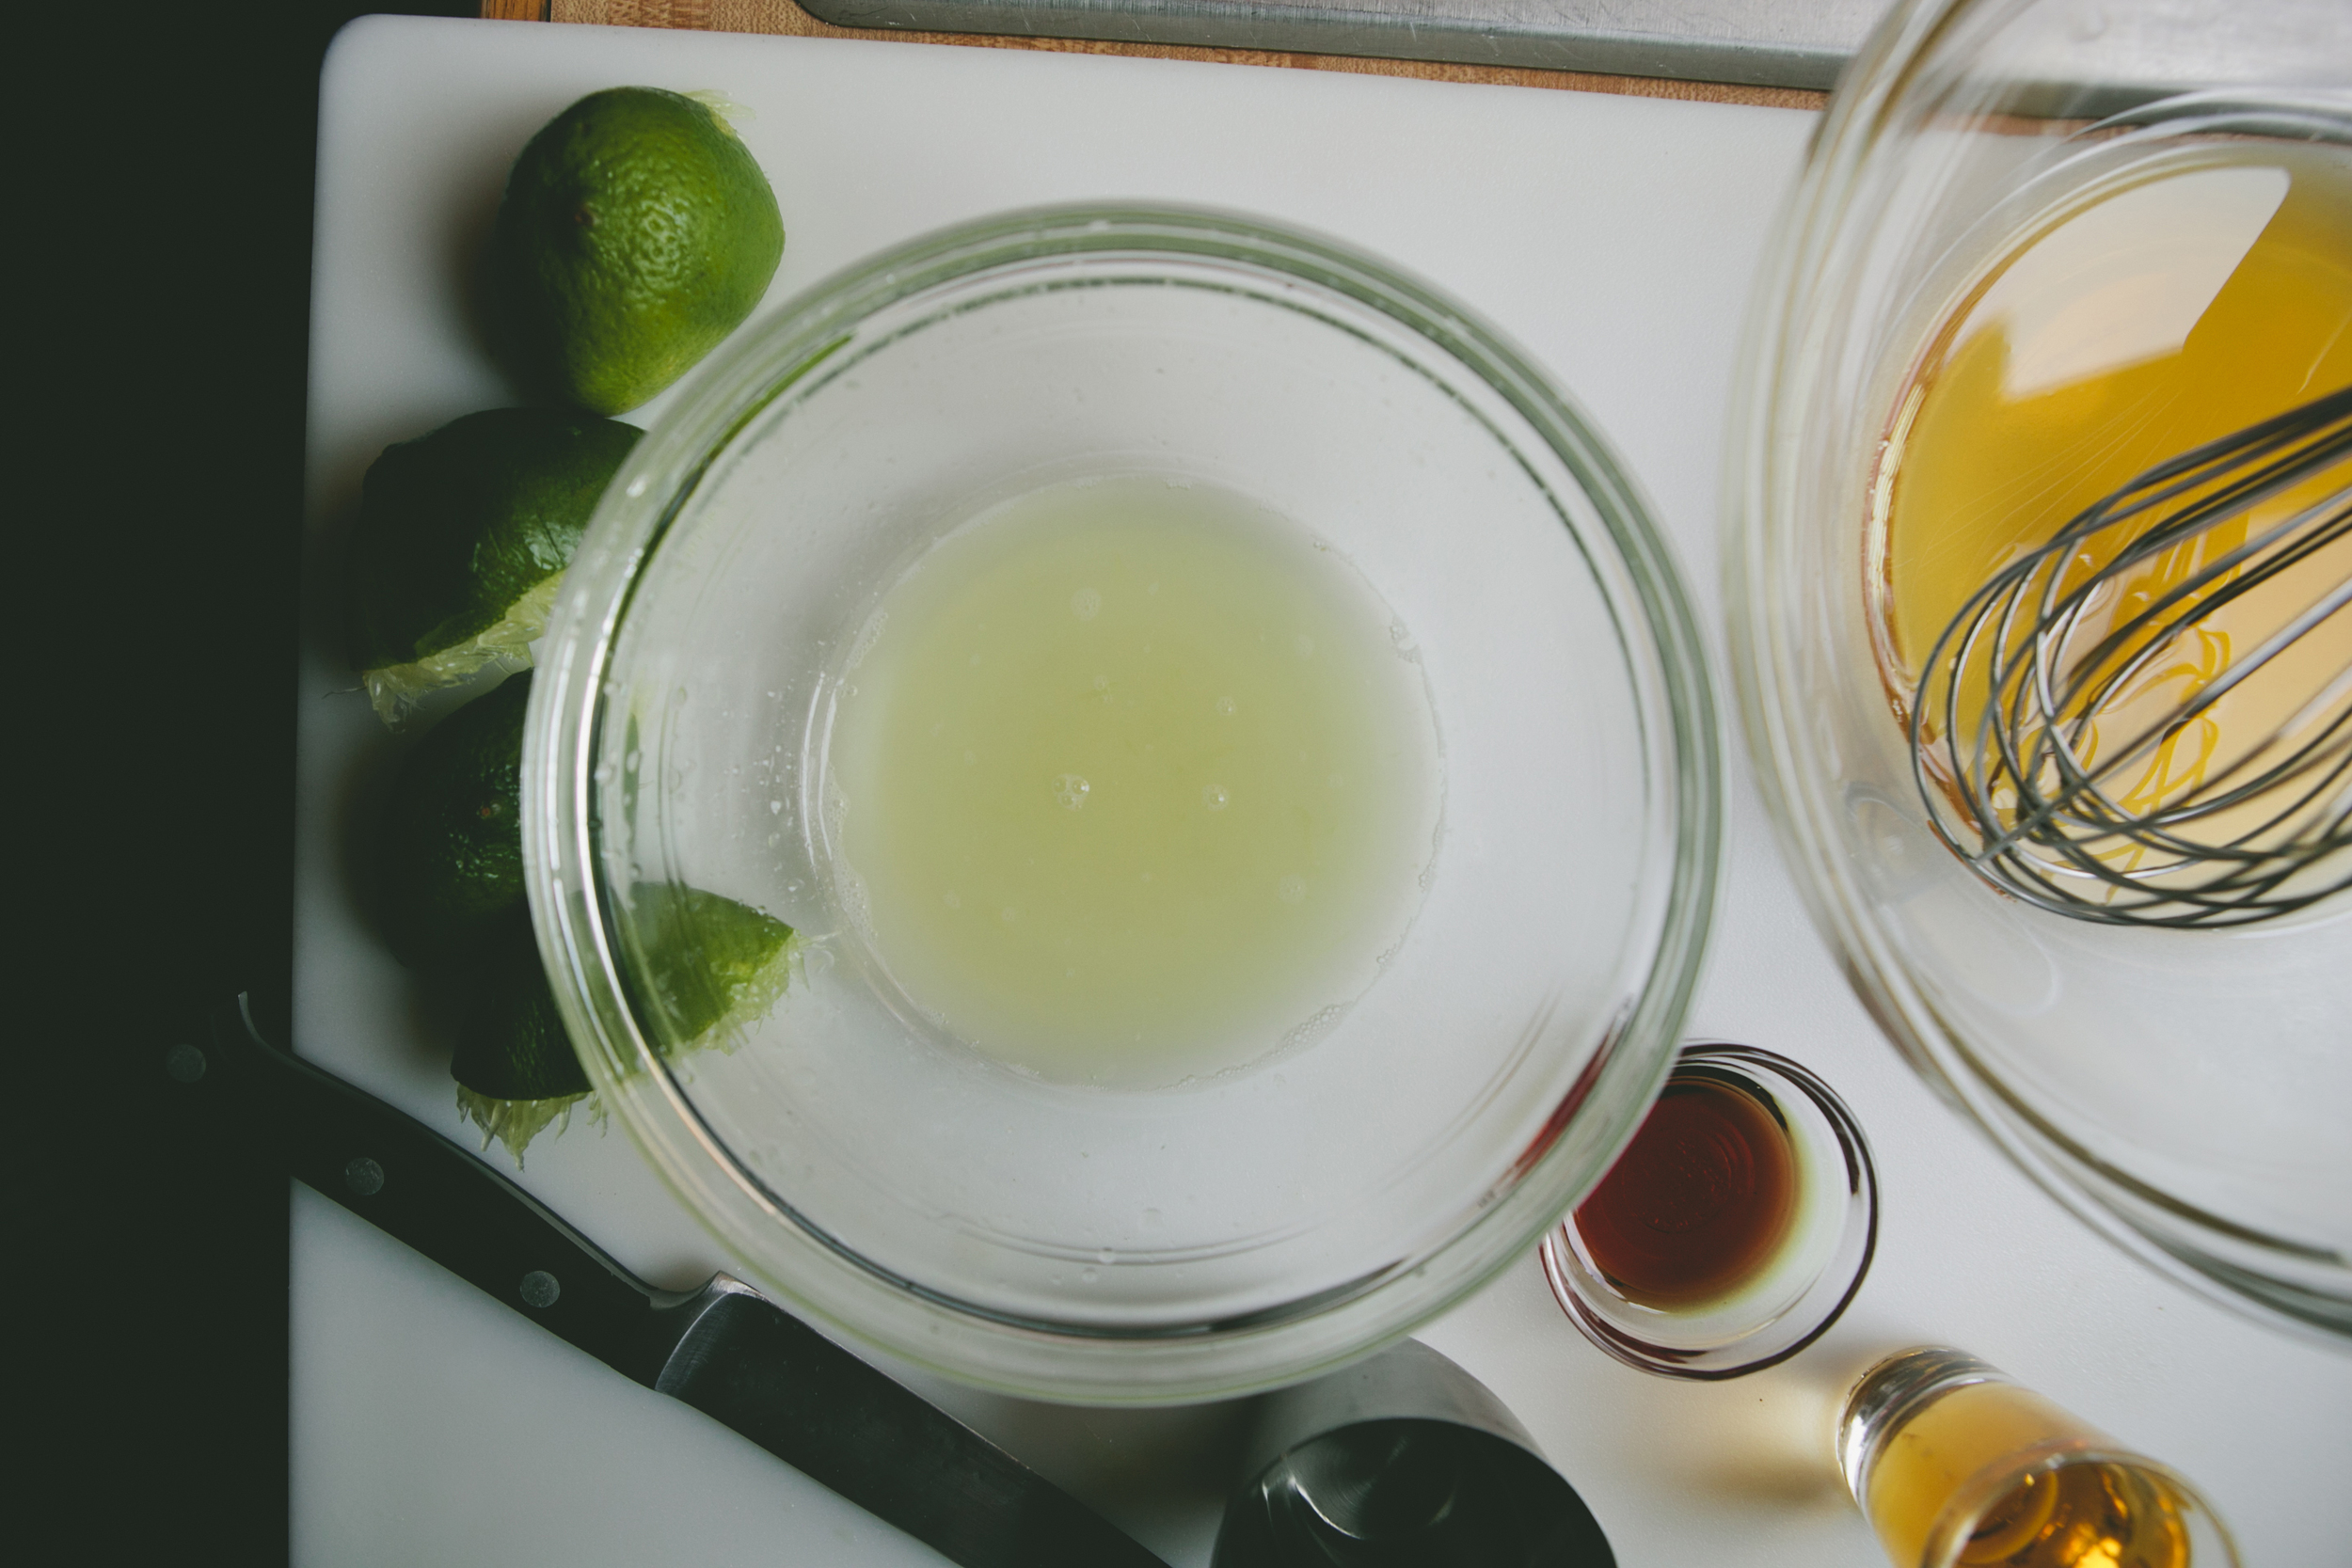
For the honey syrup 2/3 cup warm water 1/2 cup honey

For the cocktail 2 oz mezcal .75 oz Bauchant Orange Liqueur 1 oz lime juice .5 oz honey syrup 2 tsp minced ginger 1.5 tsp sesame oil

Instructions

1. In a bowl, whisk together the honey with the warm water until completely dissolved.  Set aside to cool.

2. To make the cocktail, place all the cocktail ingredients into a cocktail shaker with three ice cubes.

3. Shake for 10 seconds and then strain into a highball glass with ice.


How I Photograph Food + Restaurants with Canon Lenses

How I Photograph Restaurants with Canon Lenses || via A Thought For Food

How I Photograph Restaurants with Canon Lenses || via A Thought For Food

Some people just grow up with a brand. For me, it was Canon. It's what my parents purchased, thus it's what I learned on. When I bought my first camcorder in film school, it was made by Canon. As Eric and I started taking trips early on in our relationship, it was a Canon PowerShot digital camera that we picked up. So, it made sense that when I started getting more passionate about food photography and blogging that my first DSLR would be from Canon (naturally, a EOS Rebel DSLR).

Over the last five years of taking pictures (thousands and thousands of them), I think I've grown a lot as a photographer. In part, it has to do with the amount of experimentation I've done; working with natural light, some basic styling, and composition to get the right look and feel for each dish. But there's no denying that the equipment I've practiced on has influenced my work.

Initially, I shot everything for A Thought For Food using the lens that came packaged with the camera body (often referred to as a “kit lens”). It was an 18-55mm f/3.5-5.6 and the results were ok... but the images were lacking the depth that I strove for. After researching lenses, I decided to purchase an EF 50mm f/1.8 II lens. Everywhere we traveled, every time we went out for lunch, I took that with me. It was light and compact, making it ideal for getting in some quick shots at a busy restaurant. I began a series of posts called Silent Sundays, where I did my best to capture the essence of these establishments. A few months later, I was asked by one of these restaurants to take professional photos for them. They liked what they saw in the Silent Sunday post and wanted me to come in to photograph their new menu items, as well as action shots of the dining room and in the kitchen.

After more work came in, I knew an upgrade was in order.  The best resource out there are other photographers, so I reached out to the ones I'd become friendly with. Everyone told me the same thing: spend the money on lenses... then upgrade your body when you're ready. Since I'm doing a combination of food/restaurant photography, as well as general lifestyle work, I wanted something that would be versatile, allowing me to not only take pictures of dishes and ingredients, but portraits as well. I borrowed a friend's EF 24-70mm f/2.8L II USM lens and knew that'd be the one to get the job done.

From there, I upgraded my camera body to an EOS 7D. Then I picked up some more lenses: an EF 50mm f/1.2L USM (a worthwhile purchase because of its wide aperture and USM (UltraSonic Motor), which allows the lens to autofocus faster than other models,), an EF 100mm f/2.8L Macro IS USM, and an EF 17-40mm f/4L USM. Last year, I bought the Canon EOS 5D Mark III (which has a full-frame sensor, versus the EOS 7D which is a crop-frame) At $3400 it's a scary purchase, but I'm absolutely in love with it. For those who feel ready to make the investment, you won't regret it.

Now that I've given you a little backstory, let me explain what's going on here. A few months ago, Canon asked me to talk a bit about how I use their lenses to photograph restaurants. To demonstrate this, I went to one of my favorites in the area, West Bridge. The design of the space is some of the best I've seen. There's a balance between rustic and modern that they've nailed and this also comes through in the food created by Matthew Gaudet.

You can view more restaurant images over on my portfolio site.

Interior of West Bridge in Cambridge, MA|| via A Thought For Food

Photographing Restaurants with Canon Lenses

What's in my bag: Canon 5D Mark iii* Canon 6D (backup)Canon 24mm* Canon 50mm* Canon 24-70mm* Canon 100mmSD cards Batteries

West Bridge in Cambridge, MA|| via A Thought For Food

Interior of West Bridge in Cambridge, MA|| via A Thought For Food

Interior of West Bridge in Cambridge, MA|| via A Thought For Food

Interiors + Exteriors

Dining at a restaurant isn't just about eating and drinking, but environment and mood too. Before photographing a dish, I capture other details: table setups, the bar, the kitchen, as well as any signage or outdoor dining area.

The majority of the time, I’m using one of two lenses: the EF 17-40mm f/4L or the EF 50mm f/1.2L.  The EF 17-40mm f/4L is a wide-angle lens, and, therefore, is able to take in a large amount of space in a single shot. The lens also works well in tighter spaces, such as restaurant kitchens. This is what I use almost exclusively for photographing dining rooms. It should be noted that, like all lenses, the results are different if you're using a crop-sensor camera. It's a bit more noticeable, though, when using a wide-angle lens, as you won't capture the same area that you would on a full-frame camera.

When I want to feature a specific section of a dining room or focus on certain details (a row of tables, light fixtures, patrons sitting at the bar, etc) I switch to the EF 50mm f/1.2L.  This lens, with its large aperture (models vary: f/2.5, 1.8, 1.4, or 1.2) allows for a shallow depth of field; a single item can be in focus when everything beyond it is blurry. I'll use this when I want the image to feel like it's from the perspective of the patron: looking across a long line of tables or down at a menu. This is seen in the above vertical images of the dining room and table with a place setting. Since I wanted to keep the majority of those images in focus, I went with a higher f-stop (f/6). Yes, the background is a bit blurry, but the table, plate, glass and chair are all crisp. However, you can see the difference if you look at the below food image (labeled “Quinoa, Char and Kale Salad: Left: Canon EF 50mm f/1.2L USM lens, Right: Canon EF 100mm f/2.8L Macro IS USM”) that I shot at f/2.8. The dish is in focus, but the areas in front and behind are not. For more tips, and information, be sure to check out the Canon Explore Lenses website.

The size of the aperture on the EF 50mm F/1.2L makes it so more light can enter through the lens opening, thus making it ideal for low-light environments. This can be the case with a dining room, which are usually not well lit (especially during dinner service). The wide aperture allows me to shoot at a faster shutter speed (resulting in a crisper image) or a lower ISO setting (resulting in less grain (or “noise”) in the photo).

What's nice about photographing a restaurant using a fixed lens like the EF 50mm f/1.2L is that, as you walk around the restaurant looking for something to take a picture of, you already know the field of view that you're working with. This means that, in your mind, you already have your shot composed, even before you bring the camera up to take the shot. If I were to use a zoom lens, I'd have to look through the viewfinder and then compose my shot. I find this experience far more enjoyable.

Interior of West Bridge in Cambridge, MA|| via A Thought For Food

Quinoa, coconut, radish, pomegranate, and kimchi at West Bridge|| via A Thought For Food

Food

For photographing food, I'm often inclined to go with a fixed lens: the EF 50mm f/1.2L or EF 100mm f/2.8L Macro IS USM. The main reason for this is because the subject I'm shooting is stationary and, therefore, zooming in and out isn't necessary. The EF 50mm f/1.2L is the lens I use most frequently since the EF 100mm Macro would require that I stand in the middle of the dining room to capture a dish. I not only want a crisp, clean shot of the food, but it makes the subject more compelling to get some of the environment around the plate, which the 100mm won't provide.

With that being said, there are some instances when the EF 100mm f/2.8L Macro lens comes in handy. For example, there are times when a portion of a dish is more visually interesting than the whole plate. We'll use the beet and salmon roe toast featured below as an example. While this is a gorgeously composed plate, I find that the textures and colors of the dish are what really make it so striking. Therefore, getting in nice and close to the layers of beet, mustard, and roe, showcase it better than the shots photographed with the EF 50mm f/1.2L or EF 24-70mm f/2.8L .

Speaking of the EF 24-70mm f/2.8L. For a while, this was the lens I used exclusively for photographing food. And it does the trick. While I don't use it as often, I find that it comes in handy when I need to get an overhead shot of a table with multiple plates on it. The EF 50mm f/1.2L, as you can see, isn't wide enough (I'd have to stand on a chair or ladder to make that work). The EF 100mm f/2.8L Macro definitely wouldn't be the right lens. With the EF 24-70mm f/2.8L, I can usually hover above the table and get the shot that way... but I'm also 6'1" tall.

Quinoa, coconut, radish, pomegranate, and kimchi at West Bridge|| via A Thought For Food

Beet and Salmon Roe Toast at West Bridge || via A Thought For Food

West Bridge || via A Thought For Food

Wrapping Up

Yes, this has been an epic post... but a few more notes.

As I mentioned earlier, the lenses are where you should be investing your money. If you're just starting off in the world of food photography, I'd suggest starting off with an EOS Rebel DSLR and an EF50mm.  In fact, I had the pleasure of testing out a newer model of the Rebel, the EOS Rebel T5i, and an EF 50mm f/2.5 Compact Macro lens, which Canon sent along for me to play with. One thing I enjoyed about it, which I wasn't quite expecting, was how light it is. I've been carrying around a hunky camera for the last few years and it gets exhausting after a while (again, it's totally worth it).  The EF 50mm f/2.5 is a great intro into the world of fixed lenses. It's not an expensive investment and you'll see a huge difference from any smart phone pictures.

And before purchasing any very expensive lenses (we're talking $1000+), I'd suggest renting them from a photography store. For under $100, you can make sure that the lens works for your needs.

Photographing Food at West Bridge with Canon Lenses || via A Thought For Food

IMG_3456

DISCLOSURE: This post was sponsored by Canon. As described earlier in this post, I've been a long time fan of their camera equipment. All thoughts and words are my own.

Baked Branzini with Brown Butter Green Beans + Sweet Potatoes

Impulse buys are never ordinary in our house. When we go to Whole Foods to pick up an ingredient or two, inevitably the basket is full by the time we make it to the cashier.  For some, those purchases would be snack foods: cookies, chips, ice cream. And we'll get those from time to time. But that's not what often makes its way into our pile. Instead, it's cheese, olives, bread and fish. Yup, we impulse buy fish. It's just so hard to pass that counter and not buy one of those beauties.

This happened on a trip to the store last week.  I just went over to take a peek at their selection and saw the gentleman placing fresh branzino on top of bins of ice. I couldn't resist. Branzino is the perfect fish to prepare as a meal for two. They're not all that big, so a couple would be sufficient for dinner. Getting them ready for the oven isn't a huge production either... this can easily be done in under 45 minutes.


Baked Branzini with Brown Butter Green Beans and Sweet Potatoes

Yield Serves 2

Ingredients

2 whole branzini (1-1 1/2 pounds each), scaled, gutted and cleaned Olive oil Kosher salt 1 lemon, sliced 4 garlic cloves, peeled Tarragon Smoked Paprika

2 sweet potatoes, sliced 1/2" thick Olive oil Kosher salt

1 lb green beans, trimmed 3 tablespoons butter 2 teaspoons fresh lemon juice Kosher salt Black pepper Almonds (optional)

Instructions

1. Set the racks in the middle and bottom shelf of the oven.  Preheat the oven to 425 degrees. Line two baking pans with aluminum foil.

2.  Place the branzini on one of the prepared baking pans. Drizzle 1/4 cup olive oil over both sides of the fish and rub to coat.  Season both sides, as well as the cavity, with Kosher salt and black pepper.  Stuff each of the cavities of the fish with lemon slices, tarragon and two garlic cloves. Sprinkle a hearty amount of smoked paprika over the fish.

3. Transfer the sweet potato slices to a bowl and drizzle with 2 tablespoons of olive oil and a couple teaspoons of salt. Put the sweet potatoes on the bottom rack and the fish on the middle rack. Cook for 20 minutes.

4. Meanwhile, set a large pan over medium heat. Add butter and let melt. At this point it will begin to bubble and foam. Keep an eye on the butter and watch for it to turn brown. Once it turns brown and begins to smell nutty, it is done. Add green beans and cook for another 2 minutes. Season with salt, black pepper, and lemon juice. Sprinkle almonds on top.