Dessert

Balsamic Roasted Strawberry Sauce

Balsamic Roasted Strawberry Sauce
BalsamicStrawberriesTrio2

Until now, it hadn't quite hit me that Eric and I had bought a house.  There were a lot of questions that we'd been waiting answers on... like when exactly we'd be closing. Which then left a lot of other things open. Would we be able to refinish the floors before we moved in?  Would we be able to paint rooms? And when the heck would we even be moving? But now a lot of these questions have been answered and we can officially get excited about the move.  Currently, I'm not that stressed about the process. Yes, I know there's a lot of work to be done. But we're in a good place with packing and, for now, we're basking in the joy of knowing that in just a little over a month, we will be home.

It's hard to express how important this move is for us. We've been wanting to purchase a place for a long time. But, more importantly, we've wanted to live in a place where we felt comfortable. Living in South Boston has a lot of benefits, but it never felt like a place where Eric and I could be ourselves. We're looking forward to becoming a part of our new town's community; to embrace all it has to offer. And I think we both agree we'll be welcome with open, loving arms.

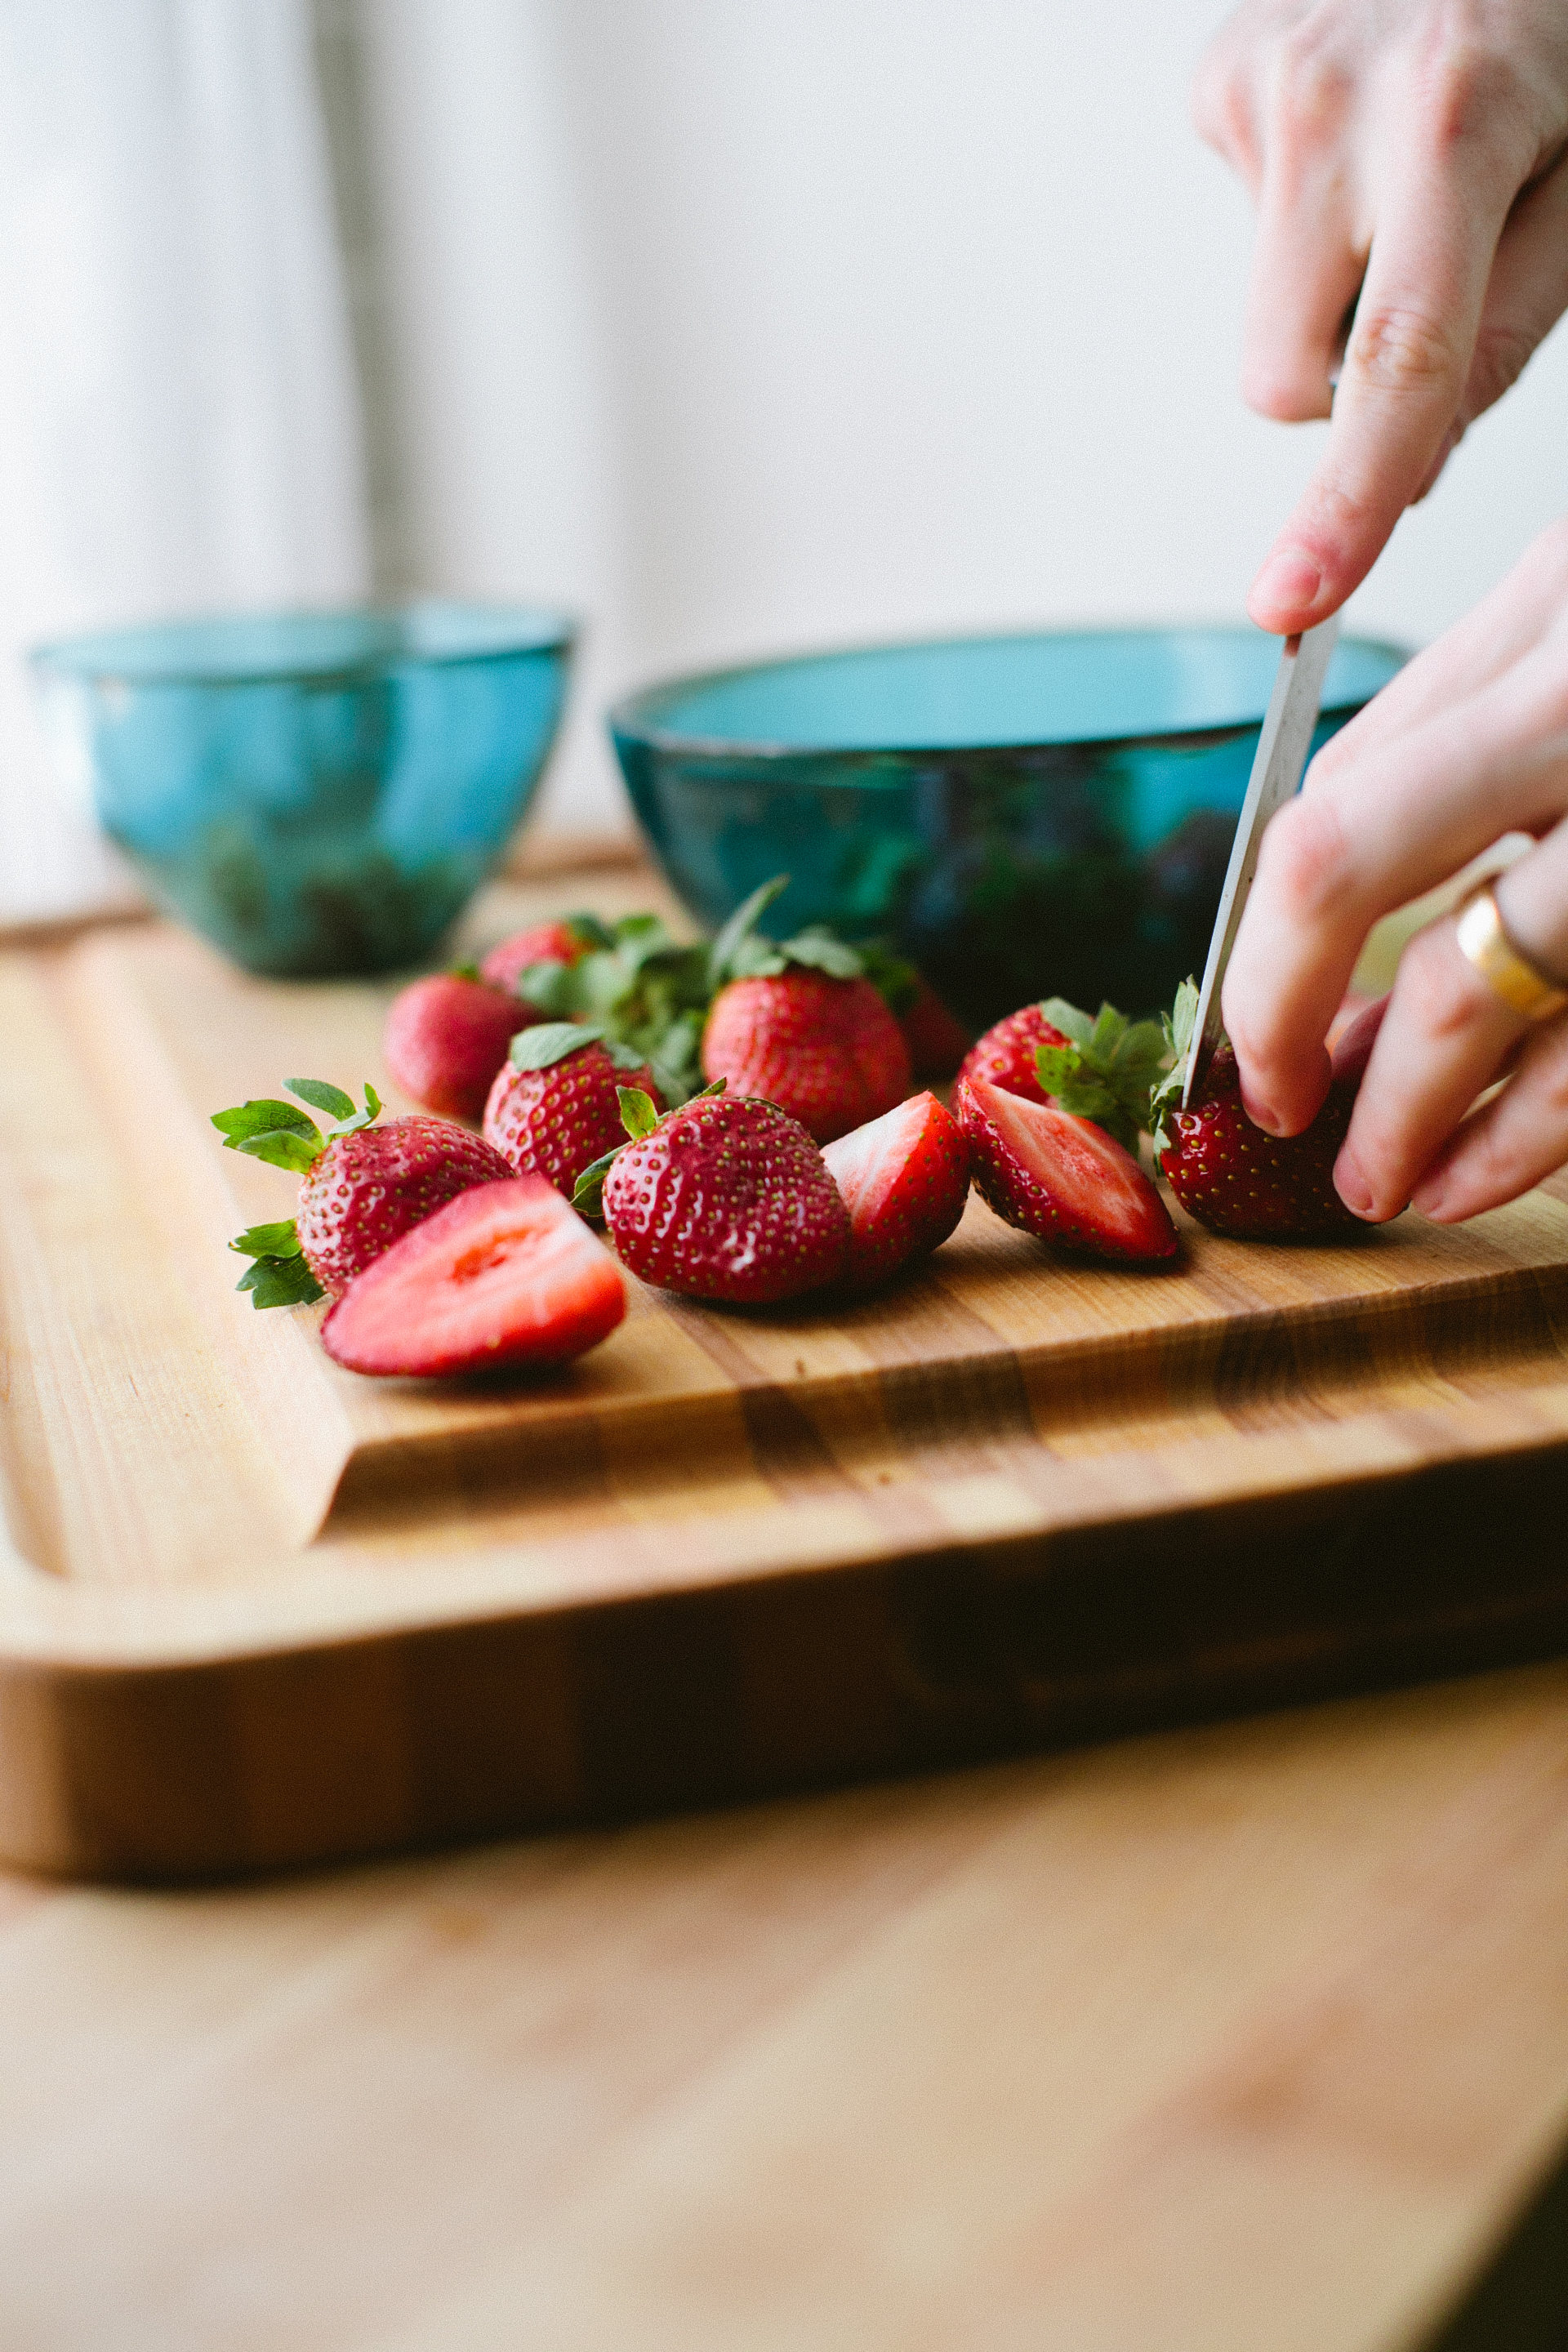
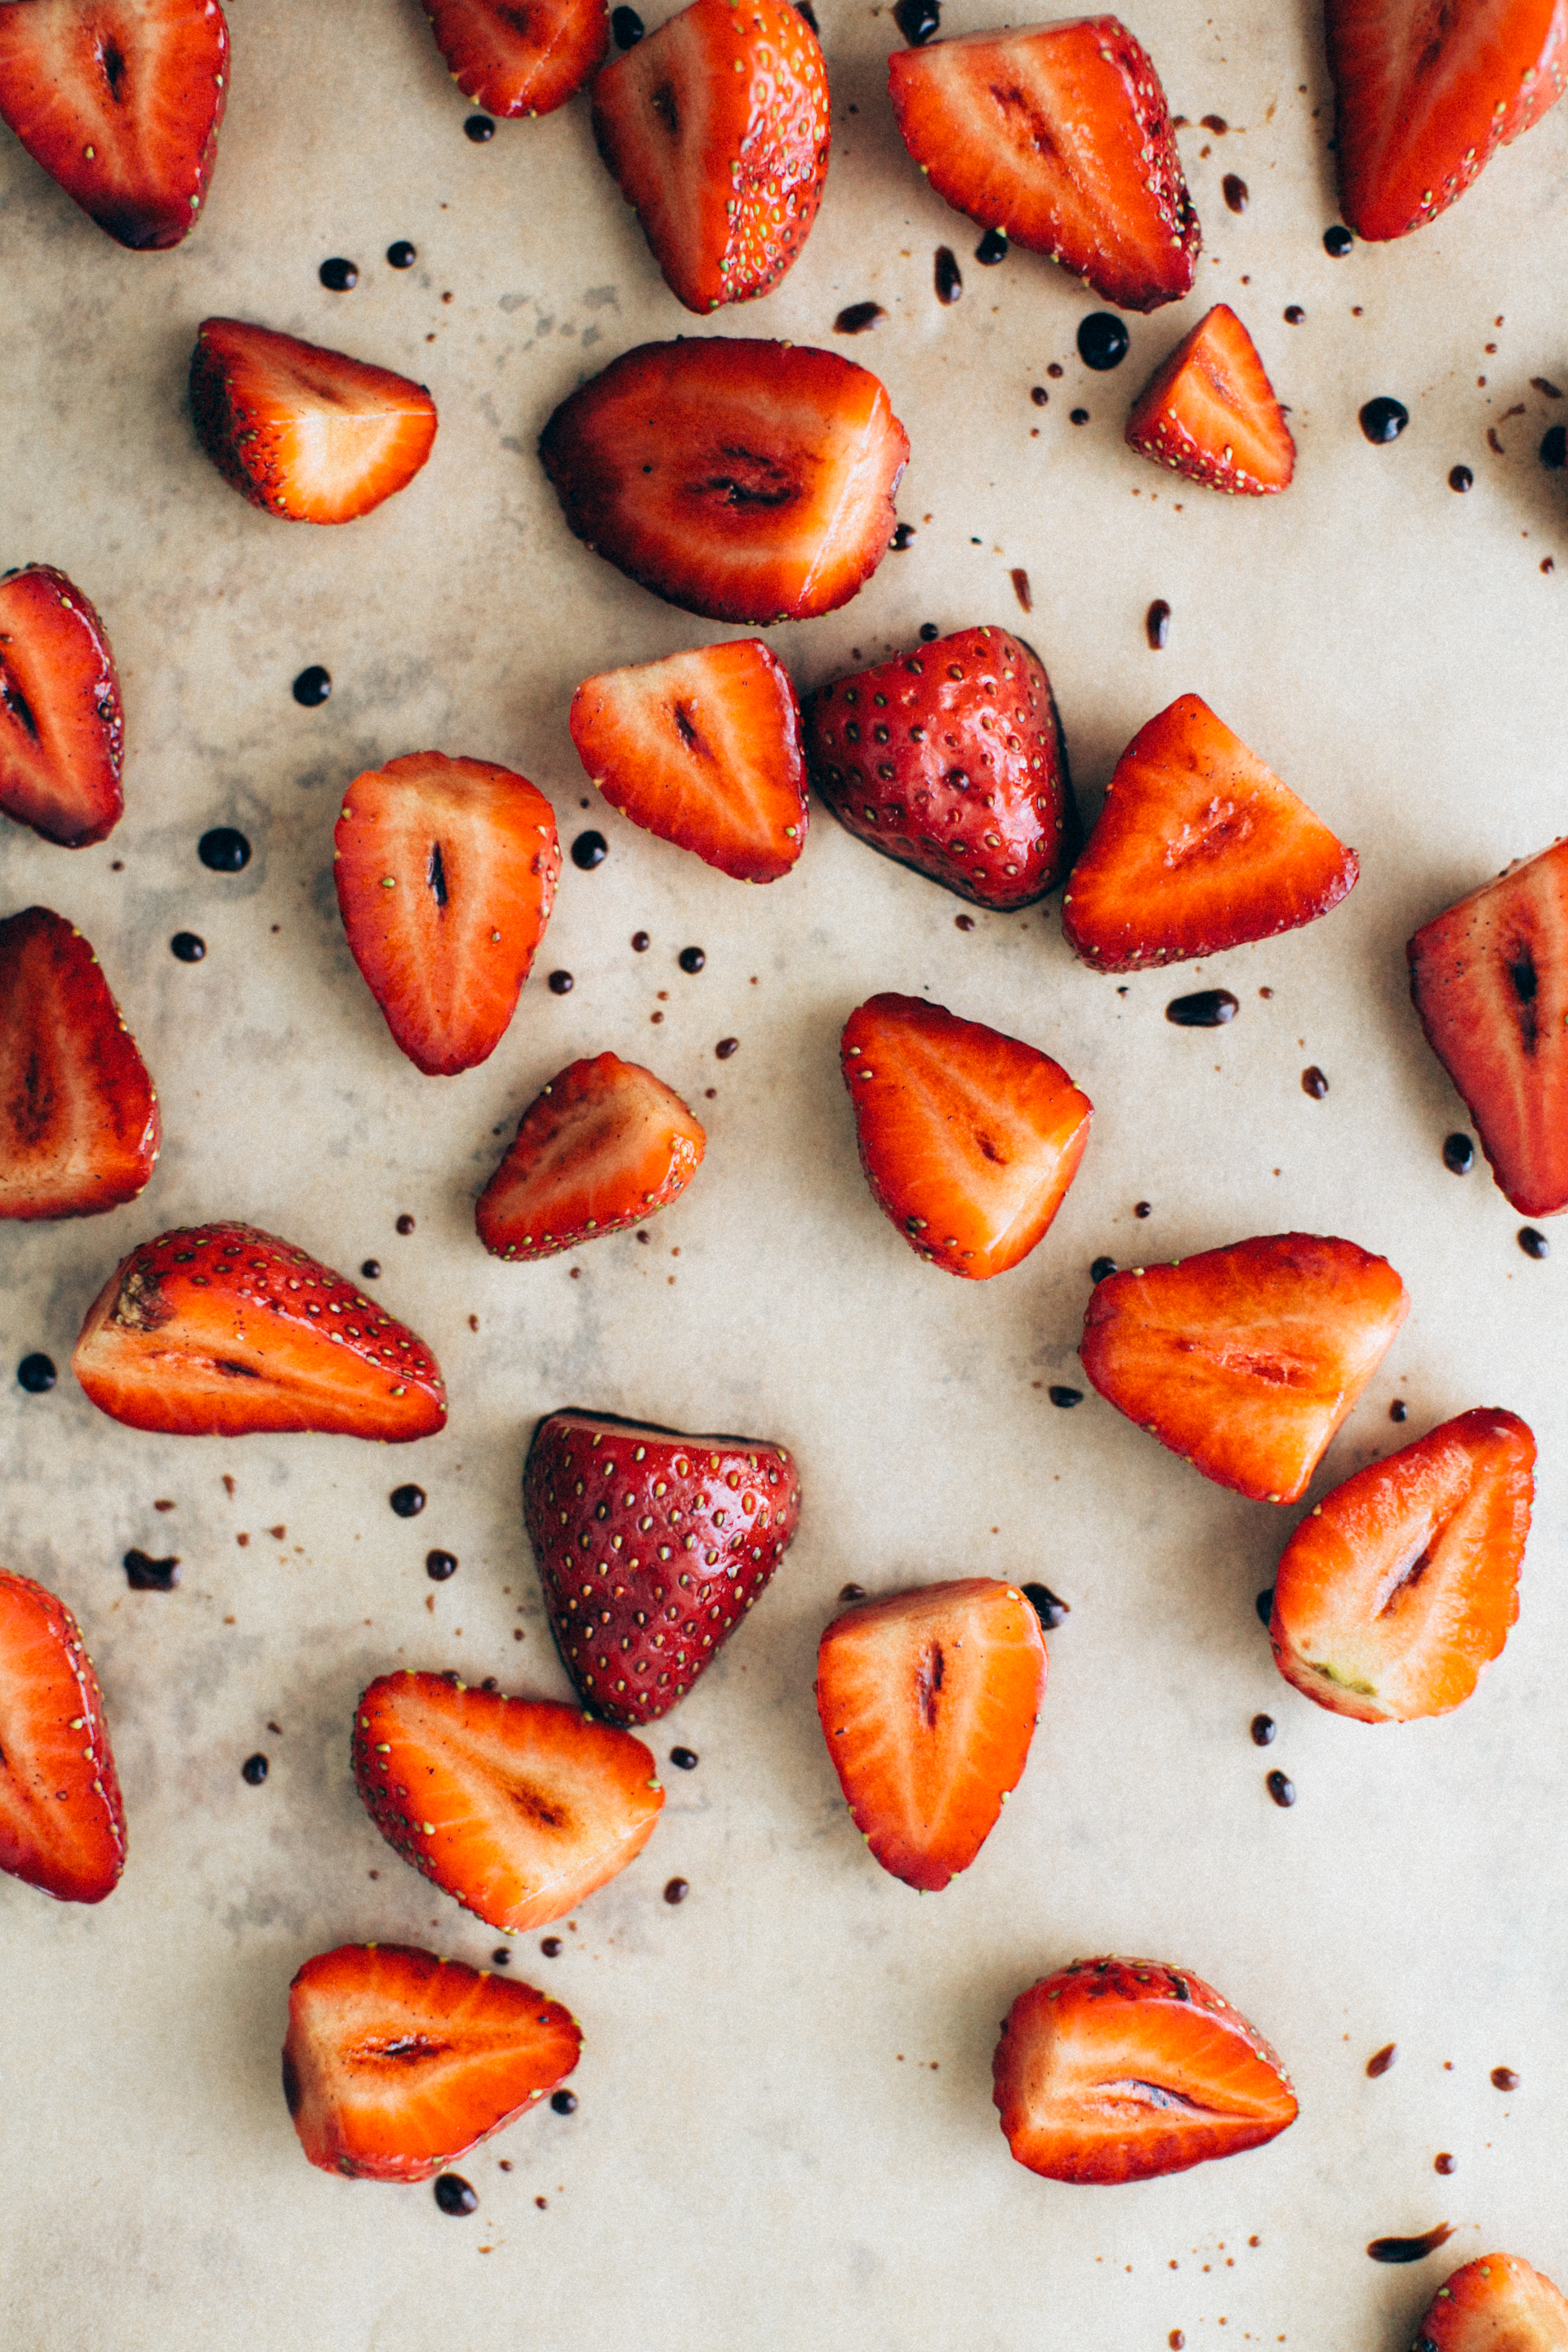
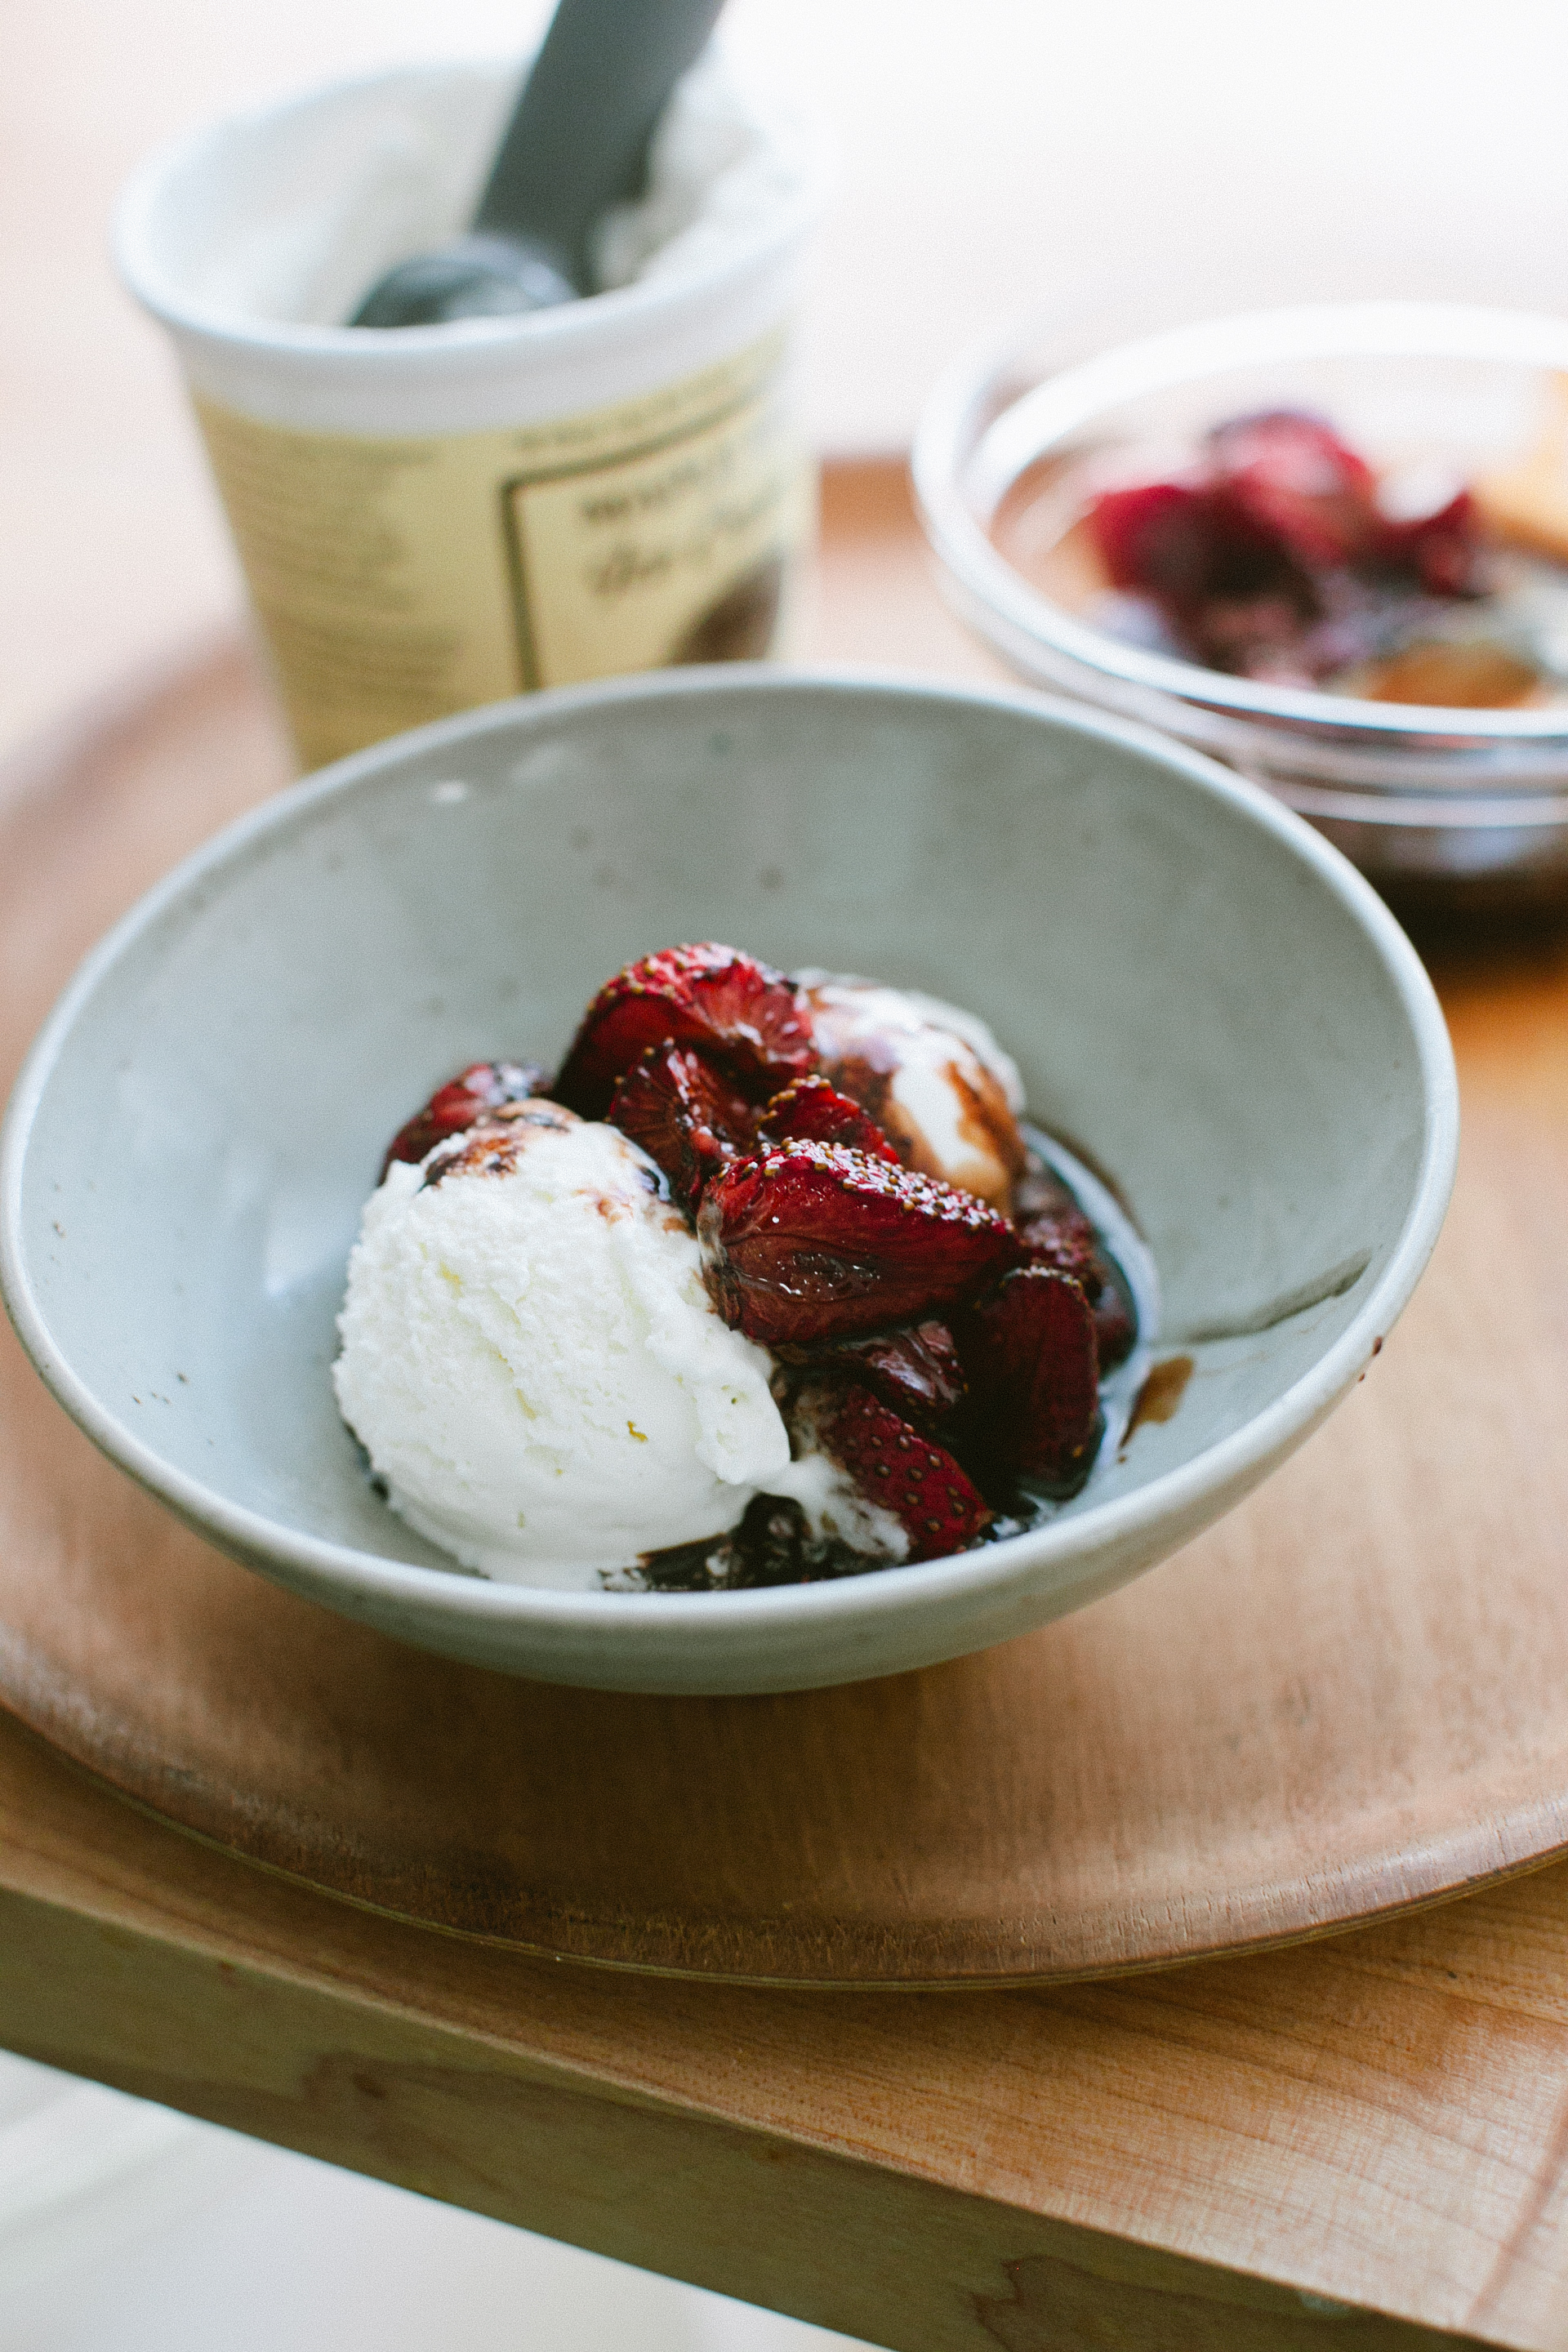
Last week, we got our first container of Florida-grown strawberries in our farm share box and while maybe I should have just let them be, I was too excited. Roasting the berries doesn't take a way from their flavor, but, instead, deepens it. Their tartness shines through the balsamic reduction. Including ice cream just brings the dessert together. And who ever passes up on a chance to eat ice cream?  Not this guy.

Balsamic Roasted Strawberry Sauce

Balsamic Roasted Strawberry Sauce

Yield 4 servings

Ingredients

2 pints of strawberries, hulled and cut in half
1/4 cup brown sugar
1/2 teaspoon vanilla extract
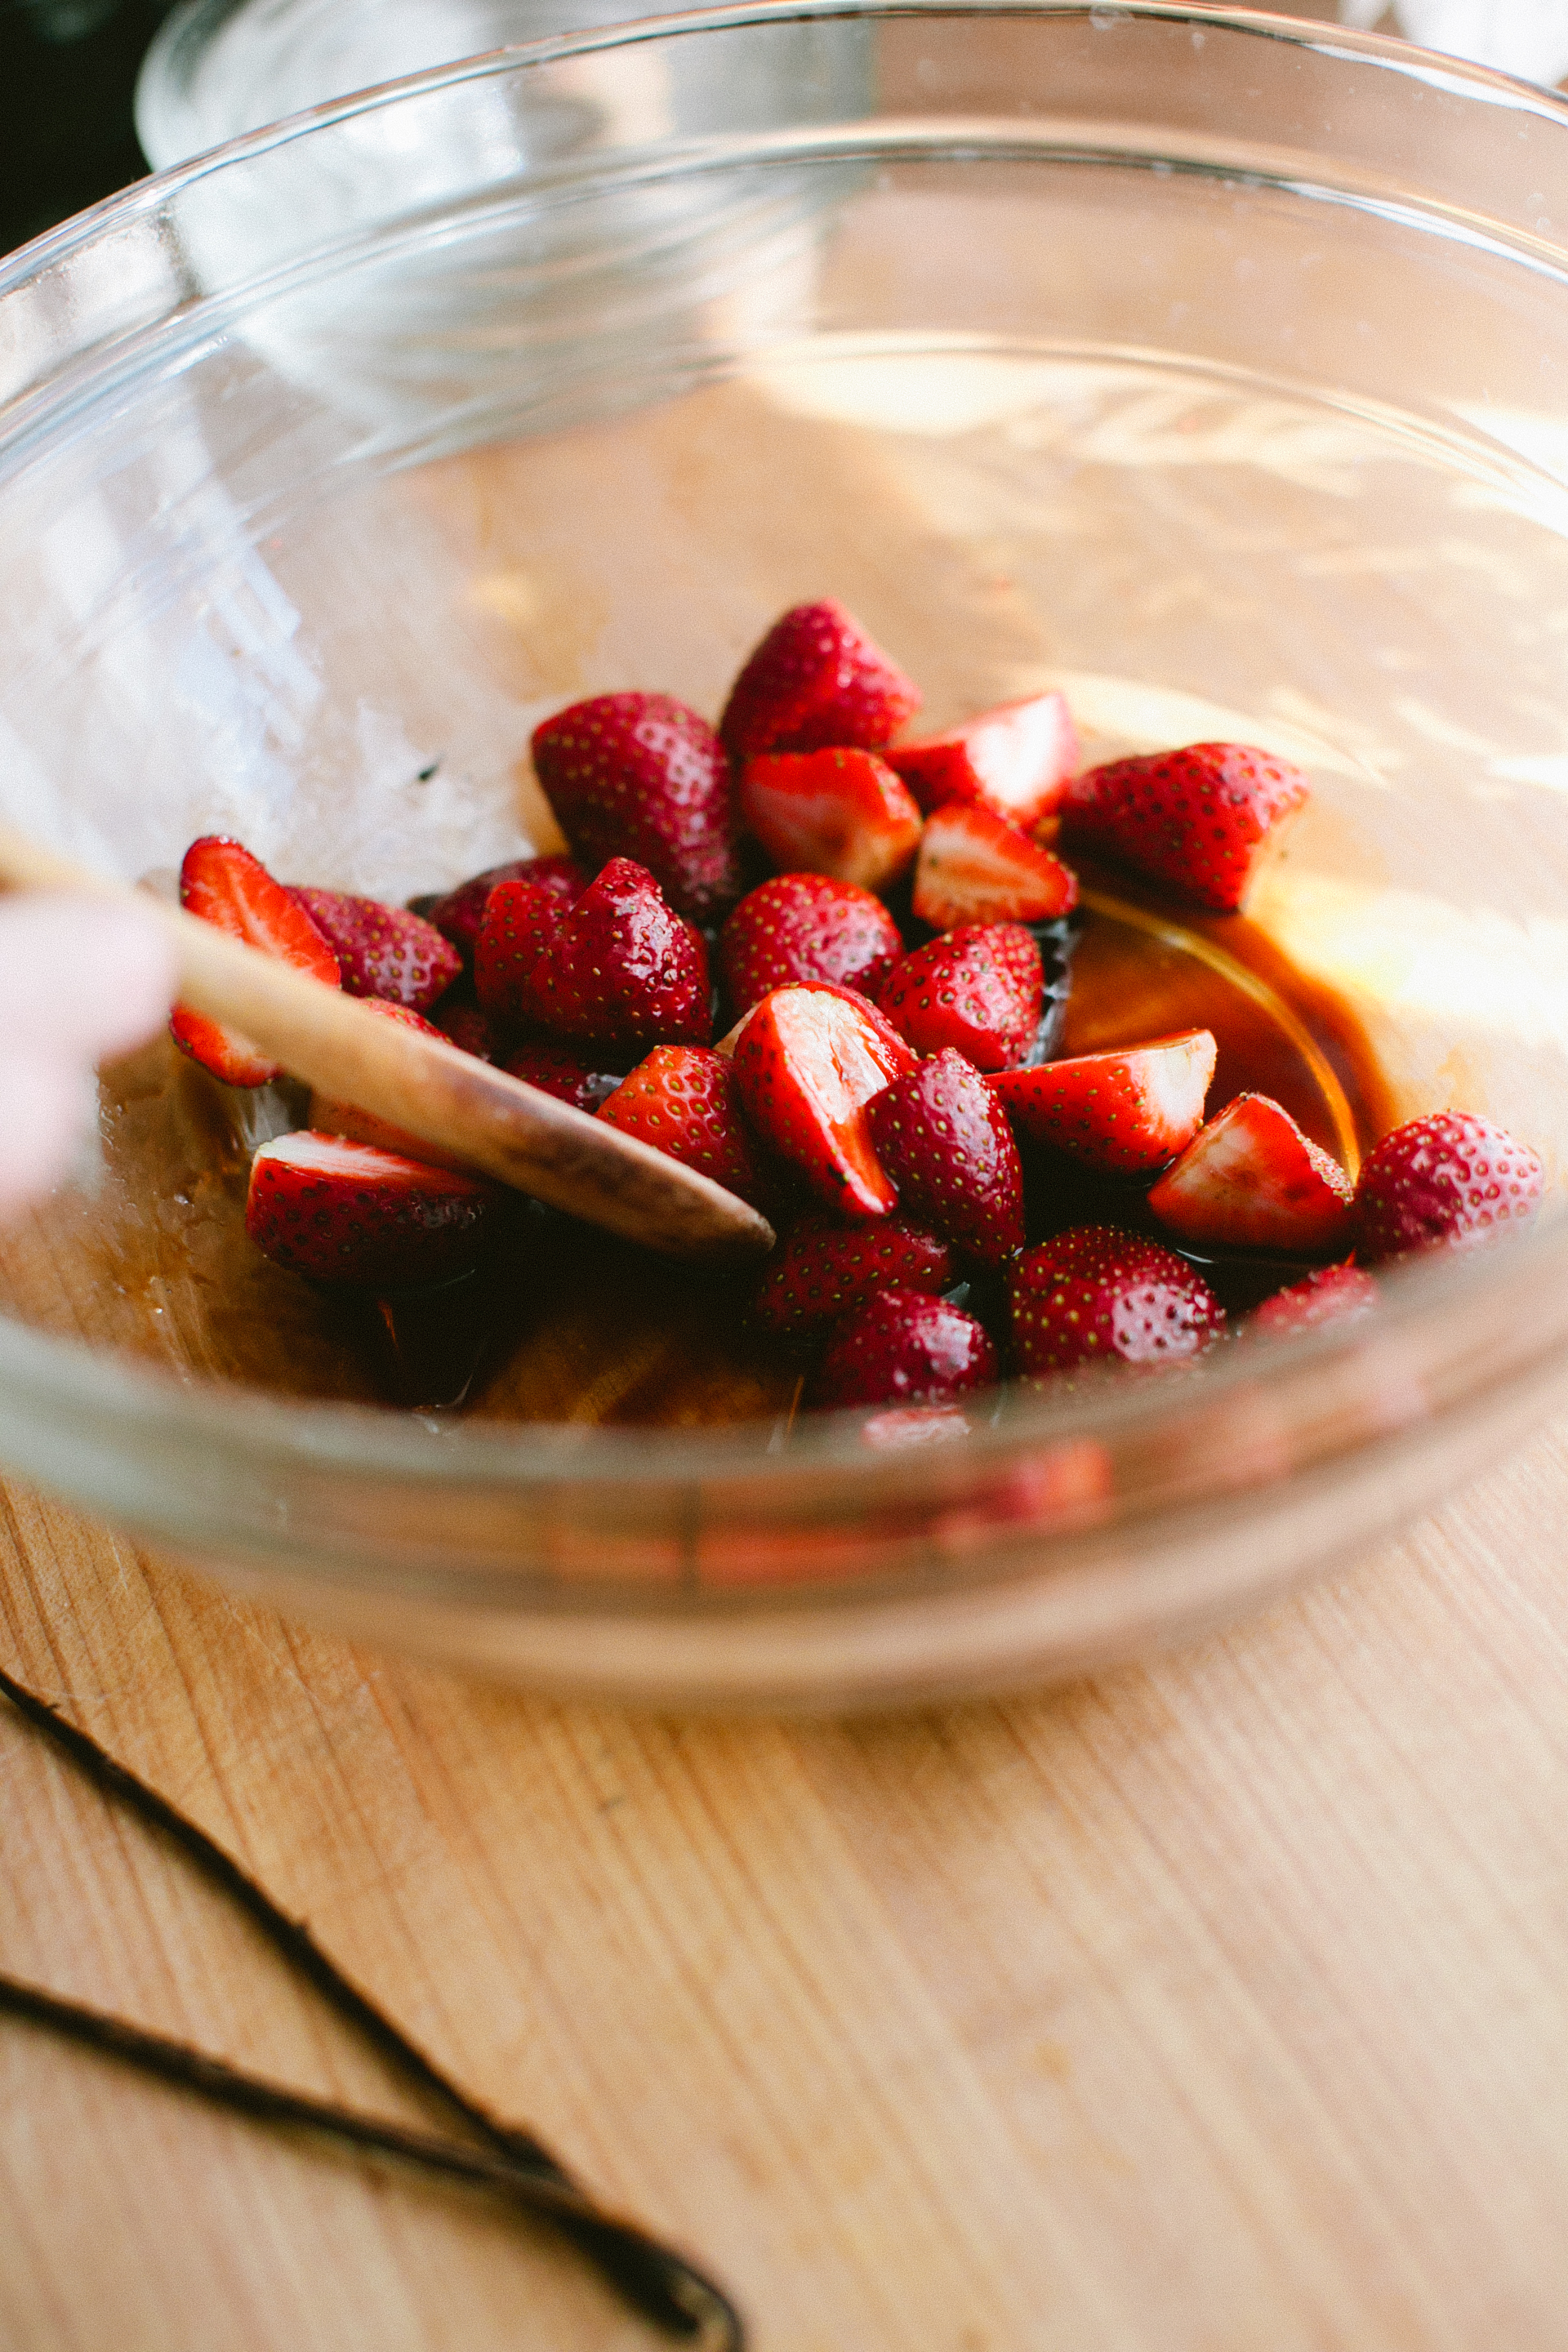
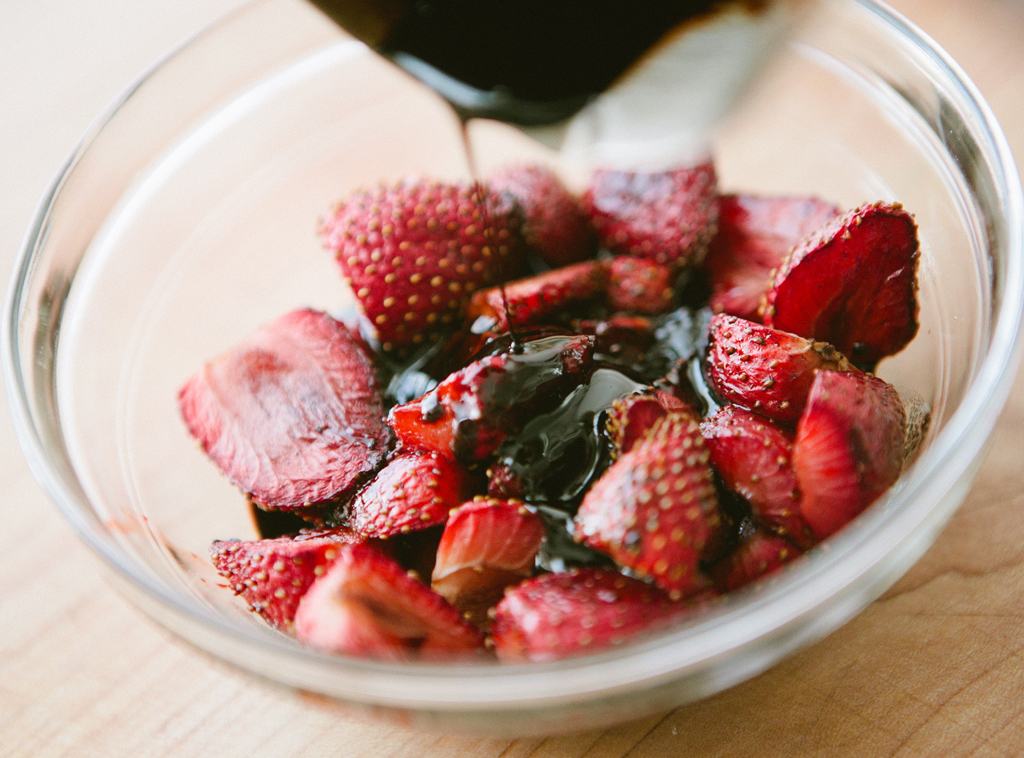
1 cup balsamic vinegar

Ice cream (or, if having for breakfast, plain yogurt)

Instructions

1. Preheat the oven to 400 degrees. Line a baking sheet with parchment paper.

2. Whisk together the balsamic vinegar, brown sugar and vanilla. In a bowl, pour 1/4 of the liquid of the strawberries and toss to coat. Spread onto the baking sheet in an even layer and roast for 12 minutes.

3. Meanwhile, transfer remaining liquid into a small saucepan and set over high heat. Once it reaches a boil, cook until liquid has reduced in half and is a syrupy consistency.

4. Remove strawberries from the oven and transfer to a bowl. Pour balsamic reduction over strawberries and toss to coat.

5. Scoop ice cream into bowls and top with sauce.

Coconut Milk Rice Pudding with Mango Puree

Eric and I are such homebodies.  It's definitely a seasonal thing for us and with all the snow and cold weather, there are few things that can motivate us to go out. For Valentine's Day, we stayed in and plowed through the second season of House of Cards (yeah, we're a part of the 2% that finished it in the first weekend) and chowed down on a massive platter of sushi.

This last week, however, was full of social engagements. A few months ago, we'd made plans with Eric's brother and his wife to go out for an adults-only dinner. It's been years since the four of us have gone out without the kiddos and, as much as we love the little ones, it was nice to have a night where we could have some uninterrupted conversations.  Then there was dinner with friends at Alden and Harlow, a recent addition to the Cambridge restaurant scene... and, folks, if you make it out this way, you must try it.  This is my kind of food, seasonal dishes made with local ingredients, creatively prepared and, yet, completely unpretentious. There was a roasted yam that blew my mind. Oh, and if you're a meat eater, definitely get the Secret Burger (I couldn't resist a small bite and I'm so glad I did because it was fantastic).

Now, this was an especially busy week for me. Six shoots, three of which happened on one day. But it was nice having social events to look forward to after all that work.  Friday was particularly wonderful.  I helped dear friends of ours cook for a dinner party.  There was a ton of food: spicy peel and eat shrimp, guacamole with mango and avocado, Cornish game hens, and a wonderful pisco and pineapple cocktail that made for a very relaxing evening.  My contribution was this coconut rice pudding. Even though we were completely stuffed after consuming multiple courses (the dinner lasted over four hours), the dessert was a wonderful and surprisingly refreshing way to end the night.  I think the fresh mango puree and orange zest really brighten it up.


Coconut Rice Pudding with Mango Puree

Yield 6-8 servings

Ingredients

For the Rice Pudding 2 cans (13.5 oz, each) coconut milk 1.5 cups water 2/3 cup fresh orange juice 1 cup basmati rice 1/2 teaspoon salt Seeds from 1/2 vanilla bean 1/4 cup light brown sugar 1/4 cup maple syrup 2 teaspoons ground ginger 1 teaspoon grated nutmeg 1/2 cup dried currants

For the Mango Puree 2 mangos, peeled and cubed 1 tablespoon honey (alternatively, use maple syrup or another sweetener to make it vegan) 1.5 tablespoons lemon juice

Orange zest

Instructions

1. In a medium saucepan, add the rice, coconut milk, water, orange juice, salt and vanilla bean and bring to a boil.  Once it reaches a boil, reduce heat to a simmer, cover partially with a lid and cook for 20-25 minutes, making sure to stir occasionally to avoid sticking to the bottom of the pot.  Stir in the brown sugar, maple syrup, ground ginger, nutmeg, and dried currants.

2. To make the mango puree, place the cubed mango, honey, and lemon juice in the bowl of a food processor and puree until smooth.

3. Spoon the rice pudding into bowls and top with mango puree and orange zest.

Chocolate Mint Brownie Bites

Mint Brownies11

2013 turned out to be a better year than I expected. 2012 was... well... stressful. As the end approached, I had wishes for a year that'd be just a bit easier to digest.  Overall, it was.  With every down moment, there were joyful events; the birth of my niece, vacations, epic dinners with friends, my first cookbook shoot, along with loads of magazine and restaurant projects.

I'm expecting that 2014 will be full of just as many milestones.  Family trips are already planned (to the Berkshires and, as usual, to the Cape) and travel to California is in the works.  Between all of this, Eric and I hope to purchase a property of our own (the search has been long... but we know we'll eventually find the right place). And, of course, there will be plenty of delicious food created and consumed, which I look forward to sharing here.

Speaking of food... let's talk about these brownies.  My sister is fond of anything with chocolate and mint.  Ice cream? Definitely.  However, these brownies, which my mom has made for us countless times, are her favorite. The best way to consume these bites is right out of the freezer. Yeah, I know... sounds weird. But, trust me, it's awesome.  They do come out a bit harder than most brownies, but there's something satisfying about gnawing on that frozen chocolate topping.  If you're skeptical, try it... then come back and thank me.

Mint Brownies

Mint Brownies6

Chocolate Mint Brownie Bites

Chocolate Mint Bites

Yield 20-24 bars, depending on how big they're cut

Ingredients

For the brownies 1/2 cup (1 stick) unsalted butter, room temperature 6 oz semi-sweet dark chocolate, chopped 1 cup sugar 1 tbsp vanilla extract 1 cup flour 1/2 tsp Kosher salt 4 eggs

For the mint layer 2 cups confectioner's sugar 5 tbsp creme de menthe 1/2 cup (1 stick) unsalted butter, softened

For the top layer 6 oz semi-sweet dark chocolate, chopped 6 tablespoons butter

Instructions

1. Preheat the oven to 350 degrees.  Grease a 9x13" baking dish with butter.

2. For the brownie layer, start by melting the chocolate and butter in a double boiler until smooth. Stir in the sugar and vanilla extract. Transfer to a bowl and let cool slightly.  Whisk in the flour and salt. Vigorously whisk in the eggs until fully incorporated into the batter, approximately 30 seconds.

3. Pour batter into the pan.  Bake for 25-30 minutes or until a toothpick comes out clean when inserted into the center.

4. For the second layer, mix together the ingredients in a bowl until smooth and creamy.  Spread over the brownie layer.

5. For the final layer, melt the chocolate and butter in a double boiler until smooth.  Once it has cooled slightly, spread over the mint layer. Refrigerate the bars and, when set, cut into bites. At this point, you can put them in a container and store in the freezer.